If you need to make precise cutting for any particular woodworking project, you will feel the need of a benchtop planer. Keeping your benchtop planer in a tip-top condition should be your first priority to ensure better outputs. Occasionally, you may face the cutterhead misalignment issue that might require professional repair services.
There are different types of thickness planers to choose from, but picking the right one for your project should be your main concern. In addition, the cost and maintenance it requires may leave you think of how much does a planer cost when you are looking for the best benchtop thickness planer.
What is a Benchtop Thickness Planer?
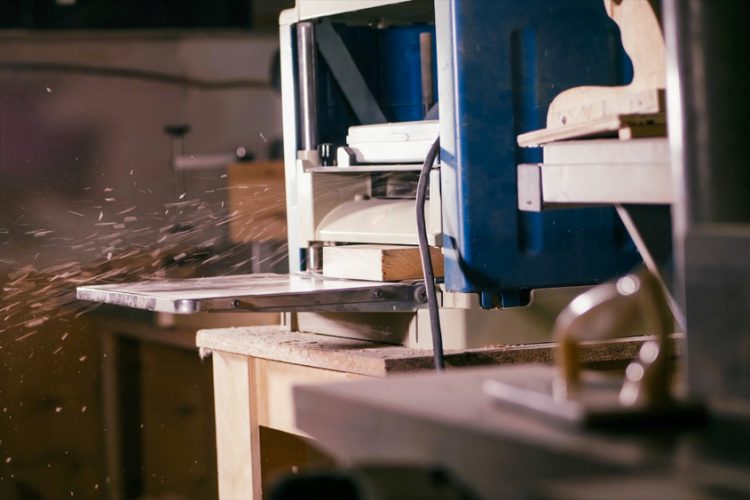
Are you in quest of a woodworking tool that delivers plain and precise cutting? A benchtop planer is exactly what you must think of at first. A thickness planer turns rough, old, and worn out lumber to a better finishing piece of work. This tabletop planer makes either side of the wood parallel and the surface, smoother.
Why Should You Use a Benchtop Planer?
A benchtop thickness planer planes the side of a board while giving it a consistent, thicker, and smoother surface. These planers are bigger in size and capacity than the hand planers. One of its major features is the cutter head that is assembled into the bed surface. A benchtop wood planer has such diverse functionalities as the following:
- It can quickly produce flat surfaces in a single pass
- It can provide precise shapes and thickness while making boards
How to Use a Benchtop Planer?
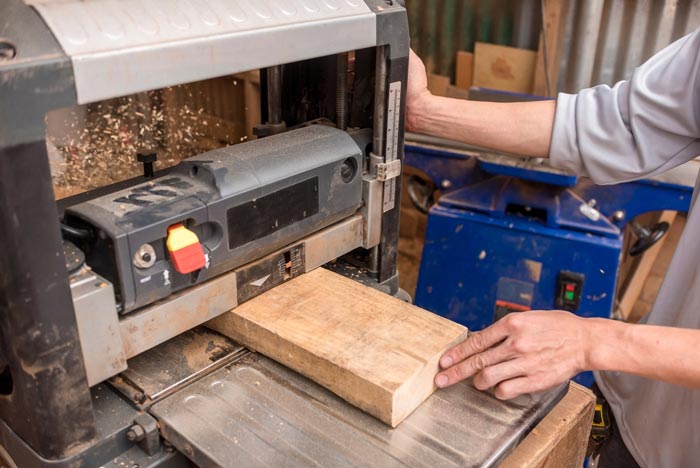
Once you have a benchtop planer, you can immediately start working on your project whether you are a beginner or an expert. So, how do you operate this tool? Here’s the guideline.
Step 1: Set up the Planer
Before you start using a benchtop planer, you need to set up the planer first. Make sure that you have removed any debris or dust on the blade area. Later, place the planer blade to the worn out or tapered side of the board where you need to plane.
Consider removing the small amounts from the board at once, especially when you have multiple boards in hand.
Step 2: Plane the Flat Side
In this step, you need to plane the flat side of the board. Follow these steps:
- Put each board into the planer one by one
- Start placing the wide side of the board
- Adjust the planer and start planing a small amount of rough edges
- Plane either sides of the board as smoothest and finest finishing as possible
Step 3: Cleaning Up the Edges
In this step, you need to clean up the edges of the board after successfully planing it.
- Put each board into the planer and ensure the edge is smooth
- Put three to five boards on their edges into the planer at the same time
- Each board’s edges need to be smooth finished
Benchtop Planer Pros & Cons
As a carpenter, you might need a thickness planer that you won’t be able to work without. Since the heavy thickness planers are expensive and hard to manage, the portable ones know as benchtop planers are always preferable to handle different woodworking projects.
Let us take a look at the pros and cons of a planer.
Advantages
With these types of thicknesses, you can:
- Maintain the straightness on a double surface
- Cut the wood surface to your desired thickness
- Create boards with parallel surfaces
- Adjust the thickness of a board quickly and accurately
- Portable and not so heavy like a industrial thickness planer
Disadvantages
- One of the most common disadvantages that the users often face is getting splintered edges and pockmarked surfaces
- Cutter head misalignment is another issue that often occurs
Benchtop Planer Use: Tips and Tricks
- Don’t put the wrong side of the board into the planer
- Check to see the smooth edge enters through the machine first
- Always check the planer table for a smooth and flat surface
- Clean the planer table with mineral spirits and put a coat of paste wax for smooth gliding
- Remove screws, nails, and other embedded things from the piece of wood before putting it into the planer
- Use compressed air and a dust collection table to remove the accumulated dust
- Use mineral spirits and a clean rag to have a good grip
- Use a dust mask, a hearing protector, and safety glasses while using the machine
Finally, a benchtop planer is a must-have tool for any DIY or pro woodworker. Operating this tool is easy and it can help you get the best output for your project. So get one if you don’t have any and enjoy all the benefits a benchtop planer has to offer.


