DIY woodworking projects are now so popular all over the world. According to Porch, 76% of homeowners were involved in some type of DIY projects in 2021. People are using small projects as a way to reduce stress as woodworking and craft hobbies are a great way to relax.
Starting craft projects may seem challenging at first. We are going to discuss an easy and simple woodworking project. Let’s see how to cut bell shape in wood.
How to Cut Bell Shape in Wood? Step-by-Step
1. Gather your tools
- Piece of wood
- Pencil marker
- Band saw or coping saw
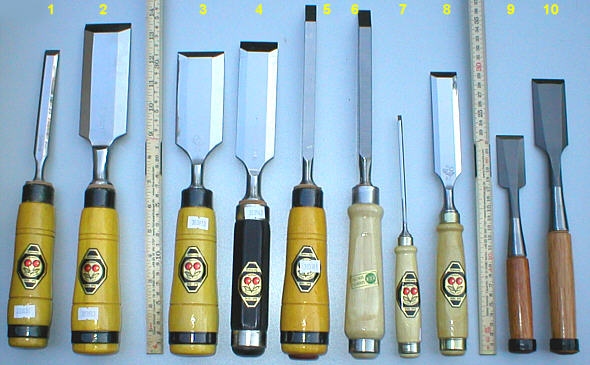
- Chisels
- Wood rasps or file
- Sandpaper
- Wood finish
2. Design and outline
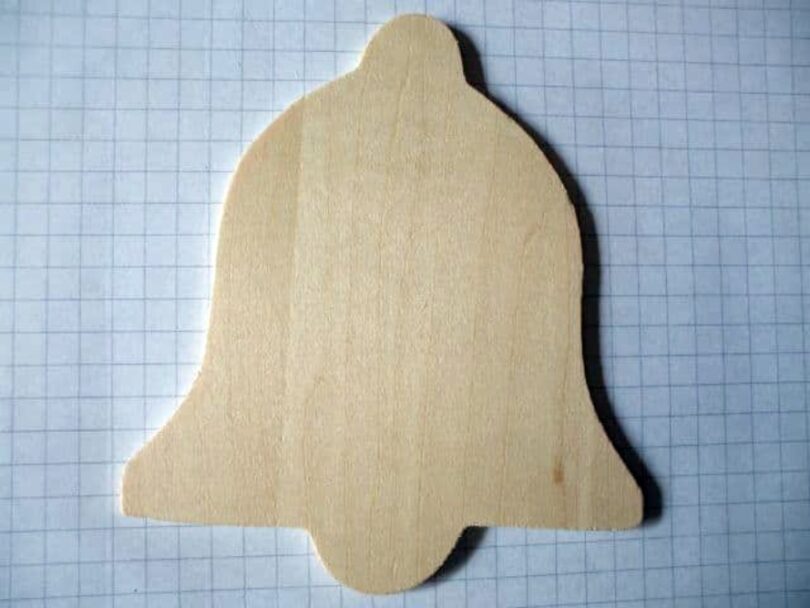
The first step of the process is to have a clear concept of the bell shape you want to cut. You can find blueprint diagrams online. You can also design it yourself on a piece of paper
Next you have to transfer the design you made onto the piece of wood. Take the diagram design of your bell shape and use a pencil or marker to mark the dimension on the wood. You need to make sure the design is mapped accurately. You can take measurements in this step if needed.
3. Choosing the right saw – coping saw vs band saw
Once you have your bell shape design outlined on the piece of wood, it is time to make the first cut. This will be a rough cut of the shape and you will need a saw for this.
There are many different saws you can use such as jigsaw, miter saw, and circular saw. You should choose one depending on the texture and type of wood you are working with.
- Coping saw
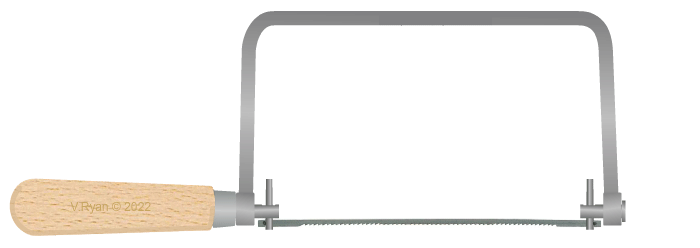
Thin pieces of wood can be rough cut easily using a simple tool like a coping saw. Coping saws are hand powered tools and they have thin narrow blades. They are not suitable for cutting curves in wood that have a thick dimension. Even though it’s mostly used for wood cuts, you can use it on other materials like plastic as well.
The biggest advantage of using a coping saw is it is portable and easy to fix if it gets damaged. They are also a popular choice among people who enjoy DIY wood carving projects because of their low cost and availability.
- Band saw
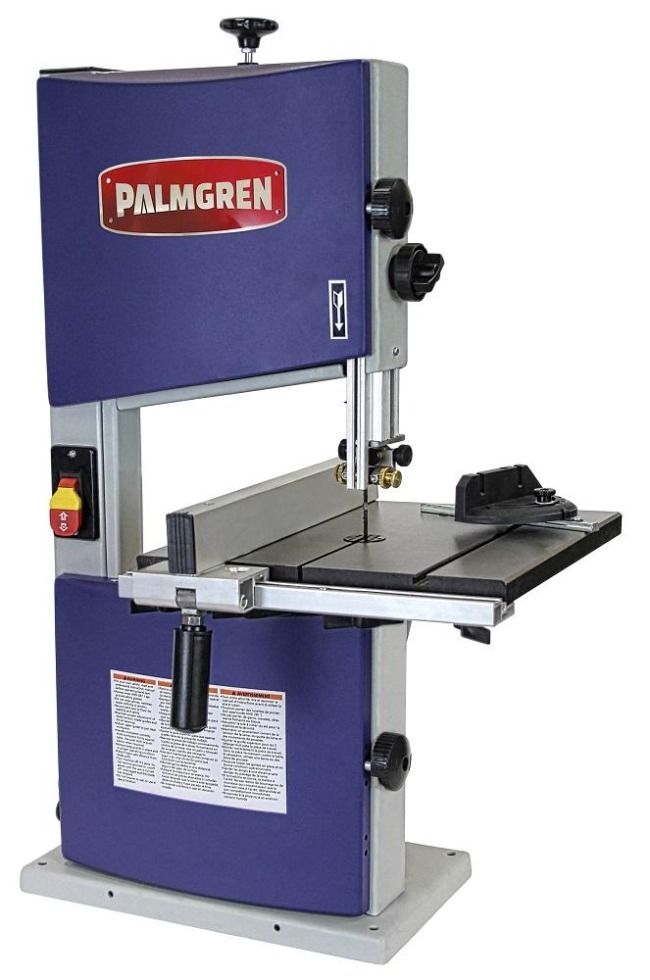
If you decide to use a thicker piece of wood, we recommend that you use a more advanced tool like the band saw.
Band saws are not powered by hand and use electricity instead which makes them a good choice to cut thick pieces of wood. They are more versatile than coping saws and can be used to cut many different materials. However, unlike the coping saw they are an expensive tool and very hard to repair.
4. Making the rough cut
When you begin your rough cut on the piece of wood, make sure you cut outside the lines you marked for your design. You should always keep extra wood in your rough cut because if you make any mistake, you will still have material to work with. It will also help you in later steps when you have to refine your bell shape cut in the wood.
5. Remove the excess with the chisel
After a rough cut has been made of your bell shape, it is time to remove the extra wood. In this process you will need chisels of different sizes.
First you need to remove the large chunks of extra wood and for that a large chisel is the perfect tool. Once you have removed the large parts of unnecessary wood, switch to a smaller chisel for the finer details.
6. Shape and smooth
The next phase needs you to use rasp or file from your tool box. They are similar tools so it doesn’t matter which one you pick in this part of the process. Both of them will help you smooth the wood curves of your bell and take you closer to the final product.
Remember to stay focused when you’re shaping and smoothing because removing too much wood will ruin your bell shape
7. Fine sanding
We are almost done with the process of how to cut bell shape in wood. Start with a sandpaper that has 80 to 120 grit. You will need to fine sand your bell shape wood project to refine it and remove any marks left by tools.
As you continue sanding the bell shaped wood, switch to a finer grit of sandpaper. You should slowly increase from 120 to 220 to 320. Fine sanding your final product will give it a smooth and shiny feel.
8. Applying a Finishing
This is an optional step but we still recommend it. You can apply a wood finish like varnish, oil or wax as a layer of protection on the bell-shaped wood. The wood finish will also improve the appearance of your diy project and give it a professional look.
You should always follow the manufacturer’s instructions when you use wood finishing.
Pro Tips
Safety first
We cannot stress how important it is to wear the right safety gear when you are cutting wood curves. Your tool box should have a pair of-
- Safety glasses
- Dust mask
- Protective gloves
- Sound protection ear plugs
Take your time
There is no rush, you should always stay focused and patient when making wood crafts. Remember, you can remove any extra material on your bell shape if needed, but you can never add extra wood.
Practice makes perfect
Mastering woodworking takes long hours of practice and experience. Don’t expect yourself to cut the bell shape in wood accurately on your first few tries. It is fine if your first diy project doesn’t come out the way you imagined.
Don’t worry because practice makes perfect. Learning how to cut bell shapes in wood is an easy way to start. Once you master how to cut curves in wood, you can try doing more complicated woodworking projects.
FAQs
Q. How do you cut shapes out of plywood?
Ans. You can cut plywood with a handsaw. If you need a rough cut, a hand saw blade that has few teeth is the quick option. But if you need clean cut lines, you should choose a saw that has a high quality tooth blade.
Q. What type of saw is best to cut curves in wood?
Ans. The best tool you can use to cut curves in wood is the circular saw. It is a simple and quick tool that was made specially for rough curves.
Q. What is the best tool for cutting plywood shapes?
Ans. The best tool to cut plywood is the hand saw. Remember that hand saws come in different types such as crosscut saw, panel saw and rip saw. Remember to check the blade length, teeth count per inch, and handle type when you are considering a handsaw for cutting plywood shapes.
4. What tool is used to cut curves in plywood?
Ans. The most common tool used to cut curves in plywood is a jigsaw. If the curve you want is gradual, you may want to use a circular saw instead.
Q. Does Home Depot cut curves in wood?
Ans. The answer is no, home depot will not cut curves in your wood. They make cuts using a panel saw which is not a saw for cutting curves. It can only be used to cut straight angles. They cannot make precise, mitered, compound or curved cuts.
Q. How to bend a 2×4?
Ans. There are two ways to bend a 2×4 piece of wood.
- Steaming:
You can steam the 2×4 with heat which will make it flexible and allow you to bend it into shape. When you have your desired shape, clamp it into place and let the wood dry.
- Veneering:
You can slice the 2×4 into thin slices known as veneers. They will bend to the radius you want without causing the wood to break or snap. Glue the wood veneers in place and clamp it in till it is dry.
We recommend using the veneer method for several reasons.
- You don’t need a steam box
- You can shape it into place with more freedom
- The shape won’t lose form and revert to its original shape (common issue with steaming method)
The only benefit of using the steam method is that wood is not wasted, unlike the veneer method where a lot of wood is gone to waste. However the veneer method is still more popular due to the challenges of steaming.