No matter you are an avid DIY woodworker or a carpenter, you must have heard about dowel jigs. The dowel jig is an excellent substitute to drill pocket holes. Store-bought dowel jigs come with a variety of functionalities, but making your own ensures that you can have any size and shape you want to dig while using it for basic and standard projects. So, DIY instructions on how to make a dowel jig would be much helpful for you in case you don’t have the best doweling jig at your woodshop.
Keeping that in mind, we are going to talk about all aspects of a homemade doweling jig. To be specific, we will discuss:
- How to make a dowel jig
- Required tools and procedure
- Safety precautions while making dowel jig
How to Make a Dowel Jig? – 6 Steps

Even a decade ago, carpenters used to cut holes and join the log slices. But later, they began using pieces of extra wood as fillers. They used to figure out the difference when dyed, stained or painted. Eventually, the output couldn’t provide a satisfying figure.
Log piece damaging is another issue that may occur due to the nature of screws. Screws may crack or damage the log piece if they do not accurately clamp down. So, using dowels is another option for hiding all of these materials inside. Let us now see how to make your own homemade DIY dowel jig.
Required Tools
- Pencil or marker
- Safety gloves
- A piece of wood
- Band saw
- A band saw table, fence, clamps
- Safety glasses
- Wooden dowels
- Drill press
Step 1: Get the Cuts (Wood Pieces)
Cutting wood is a tricky process. Don’t use hardwood and get a wood piece that is tough enough to serve you long.
- Get a piece of wood and mark with 1x1x4.5 inches
- Cut carefully on your marked area
- Try to find the same dimensional wood to avoid cutting
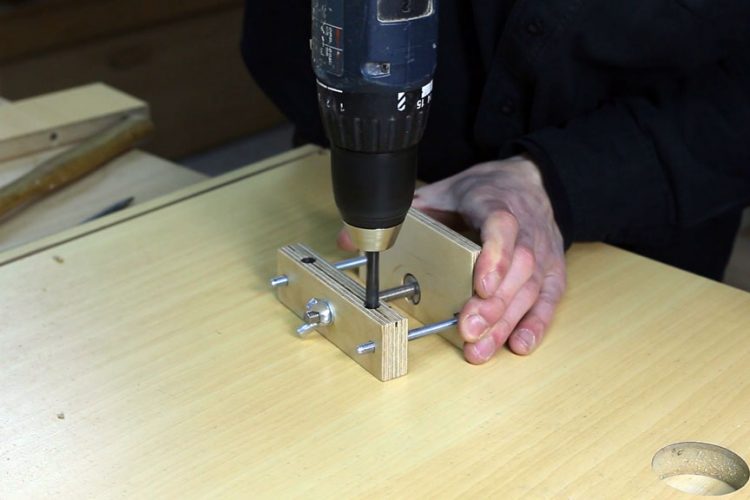
Step 2: Use the Machine (Drill Press)
Using the best drilling press, you have to create a hole similar to the size of the dowel you are going to insert. Besides, check the hole is deep enough to get through the wood.
- Mark dot in the center and end section of the wood with a pencil
- Use drill press and drill a hole on the marked area of the wood
Step 3: Make a Drawing
This step requires you to draw line in the middle part of the wood.
- Use a pencil to mark the corner side of the wood
- Take a band saw blade and mark the lines
Step 4: Usage of Clamps
You need to use clamps this time with the band saw table. With clamps, the band saw fence needs to be pushed down, and remember to put suitable clothing on while using a band saw,
- Push the band saw fence down the line you have created
- Don’t try to go fast; it may get twisted any time
Step 5: Do Some More Cutting
You need to use another clamp to fasten the jig to the band saw table. Just see that it gets attached appropriately.
- Make 3-inches of incision on the bottom middle part of the wood where you marked the wood previously
- Use the clamp to tightly joint the jig to the band saw table
Step 6: Rip the Dowel
Here, you need to examine the jig to see if it’s working correctly. Shove the dowel to get through the hole, and use the band saw blade along with the dowel. Later, rip the dowel.
Safety Precautions
Always follow these general precautions when making cuts and using drill machines:
- Do not make any adjustments while your drilling machine is operating
- Always wear safety goggles and gloves to protect yourself
- Wear hearing protection and protective footwear when needed
If you carefully follow these guidelines, you won’t have to visit any specialized store to make a dowel jig. Making dowel jig seems a daunting task and it includes a tricky design. So, make sure you follow the guidelines correctly. This simple procedure on how to make a dowel jig will surely be much beneficial to make a homemade dowel jig.


