Woodworking had historic significance and been practiced all throughout ages. The ancient Egyptians started building their furniture during the pre-dynastic period of around 3100 B.C., and from then onwards this activity has grown rapidly. Drying the wood is one of the prerequisites. Do you know how to dry wood fast for woodworking?
As basic of woodworking, drying the freshly cut wood is a very important task that you must master. Our ancestors have always used some ways to dry up the wood, and these are still one of the best methods that you can use. These methods are fairly simple, and if you follow the simple steps, you can also master the technique of drying wood for your woodworking projects.
How To Dry Wood Fast for Woodworking
Why Is Drying Wood Important?

When the fresh wood is cut from a living tree, the wood cells are saturated with moisture. As time goes by, the moisture within the cells will leave the membrane which reduces the size of the cells. The wooden block, as a whole, will shrink. As the wooden block will have cells of all different sizes and shapes, the block will contract unevenly. To prevent the woodworking projects from warping, cracking or bending, you must dry wood thoroughly.
Drying wood in a natural process can require a long time, but it is surely worth the wait. Let’s dive deeper into the steps of how to dry wood effectively.
Step 1: Preparations
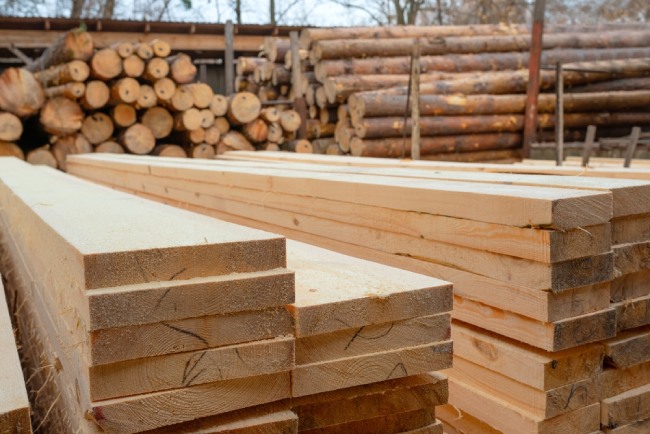
Always know what you’re going to make with the wooden pieces. This is particularly important because the wood shrinks when it dries up. Knowing the dimensions will let you cut the wood larger than what you need so that you leave space clear for it to reduce in size. Start by cutting the planks using a bandsaw or a circular saw and then sanding the sides using a high-quality sanding machine.
You must also choose a wide open space for storing the wooden planks. Make sure that you store the planks in a place where there is no moisture. You’ll also need the following items:
- A moisture meter
- Few wooden sticks for support
- Plywood or tin
- Concrete blocks
Step 2: Measuring the Moisture
The moisture level within the wooden planks is very important. Knowing the correct moisture level will help you decide onto your next step. To do this, you may purchase a moisture meter. These handheld devices can easily measure the moisture of the wood. It gives the moisture reading as a percentage of the weight of the wood, so you can easily determine when to stop the drying process. When the moisture meter shows a moisture level of around 6 to 7 percent, you can use the wood for your woodworking project.
Step 3: Positioning Your Planks
Place the wooden sticks on the ground. Maintain a distance of about 20 cm between each stick. Keep on placing the sticks until it covers the length of your wooden planks. Place a layer of wooden plank on top of the sticks until the length of each stick is covered by the width of the planks.
Step 4: Additional Layers
When you’re done with placing the first layer, you may go on with adding the second layer of sticks onto the planks. Maintaining the same 20 cm gap between each stick, you should keep on placing the sticks until it covers the length of the planks. Afterward, you can repeat step three and place the planks on top of the wooden sticks. Repeat the third and fourth steps until reaching the desired height of the planks.
Step 5: Placing the Top Layer
After you’re happy with the height of the planks, you should place plywood or a tin on top of the planks. This will save the planks during rainfall and will put pressure on the wood. You should also place few concrete blocks on top of the plywood or the tin so that it adds to the weight on top of the wooden planks. This will put a constant downward pressure which will prevent the planks from warping upwards. It will also ensure that you get a uniform wooden plank as it dries and that there are no cuts or grooves in them.
How To Dry Wood Fast for Woodworking: Things to Keep in Mind
Use Proper Storage Techniques
You must stack and store the wooden planks properly to prevent the wood from warping or developing a crack.
Avoid Using Wood from Younger Trees
Wood from younger trees should not be used. This is because the wood from the younger trees is very unstable and can have a higher rate of longitudinal shrinkage. The inner piths are not developed, which means that it’ll require a longer time to dry up and has greater chances of developing a crack.
Avoid Knots
Knots are the areas in a tree where branches grew in the past. The knots should always be avoided because the wood in the knots is distributed unevenly, which increases the chance of developing a warp or a crack.
One Other Method of Drying Wood
The traditional methods of drying wood can require huge amounts of time. Many people choose to use kiln dry techniques to dry the wooden planks quicker. The kilns are a special kind of furnaces built just for drying wood. These also have a built-in fan to enable ventilation for a faster drying. These kilns can dry up wood in less than 10 days, which makes it ideal for woodworking projects that need to be done urgently.
Although these kilns are effective, these are not recommended due to the fact that these may cost thousands of dollars to install. Adding to that, the fuel cost of operating the kilns can make it less desirable to many people.
The traditional method of drying, on the other hand, may require a lot of time but doesn’t require any further cost. This is why it is cheaper and more desirable to most of the professional woodworker.
Conclusion
Drying freshly cut wood is very important so that you can prevent your woodworking projects from warping or developing a crack. By knowing the simple steps of how to dry wood, you can get a fine dry wooden piece which can be used for your woodworking project. Traditional ways of drying wood take a lot of time, but it can give you the best results for drying cut and dry woods. You must also regularly visit the wood and look at the progress.
These are the basics of knowing how to dry wood. If you can master the technique of drying wood, you’ll not only assure the longevity of your woodworking projects but can also advance as a woodworker.


