A wood router is a useful tool ideal for a broad selection of woodworking projects. It’s a high-speed rotating device with a collet at the side of the motor shaft for connecting different router bits to the motor. While using different bits, the woodworker can attach an almost infinite number of patterns to the surface of the board. Many router systems contain a single motor that could be interchanged between a couple of foundations for flexibility.
Popular Uses of Wood Router for Beginners
A wood router is useful for many activities around the home, both practical and decorative. It is a great power tool to have because it’s compact and could be used for a variety of trimming and cutting purposes. Cutting a smooth and clean edge on a small portion of wood can be complicated, but a router can make an elegantly finished edge each time. Routers are used to create even, and flat cuts on both plain and curved surfaces, and can replicate patterns on several planks of wood.
Decorative molding may be the most remarkable thing a router can do. Using various bits, you can make everything from simple rounded moldings to even more complicated ogee or beaded shapes for windows, doors, or chair rails.
A dado is a hole or trench used to support shelves inside cabinets or bookcases. A dado is the best way of replacing shelves and is sliced using a wood router with a flat bit. This device makes it much easier to cut the most popular types of dadoes.
How to Use a Wood Router for Beginners?

You could use the wood router to create the simple and complex edges of the wooden pieces. If you are starting with woodworking and do not have a ton of experience in using a wood router, here are some guidelines on how to properly use wood routers for beginners.
1. Choose the Right Bit for Your Woodworking Profile
Whether it’s a fixed router or plunge router, every wood router should have a collet that allows you to use a broad range of various sorts of bits for various job types, each with a specific profile. There are dozens of different router bits when you consider all the patterns, shank dimensions, tips for bearings, and other preferences. You can begin with routing edges after choosing the correct bits for the wood router. You must use the wood router appropriately while routing the edges since it can cause serious injuries.
2. Install a Router Bit Properly
A correct edge profile provides a smooth turning of the bits as they are applied to the side of the stock. The first task to ensure the bit turns efficiently is to ensure that it is mounted correctly in the collet of the router. When a router bit isn’t mounted accurately, it can vibrate, resulting in a rough texture and may also be quite dangerous. Firstly, you must make sure the bit is sharp and clean. When you mount the bit inside the collet, you just have to put only around 3?4 of the shank into the collet. Then make sure that you secure the router bit in the collet properly before using the wood router.
3. Selecting Correct Speed for Router Bit
The bit can be accelerated with the highest speed of 20,000 rotations per minute by a router motor, which is more than 300 rotations each second. Most modern wood routers permit you to change the engine’s speed to suit your needs. Selecting the right speed will vary depending on the type of woods you route, but also the size and shape of the bit you select. A wood router that spins at too fast can destroy the wood, while a router that rotates too slow could leave a tattered or rough cut.
4. Shank Router Bits: 1/4-Inch vs. 1/2-Inch
The router bit shank presents the cylindrical and robust component of a router bit. It is the section of the bit that fits into the router’s collet. There are two typical router bit shank dimensions and they are 1/4″ and 1/2″. Most wood routers arrive with easily replaceable 1/4 “and 1/2” collets so you can use either sized bits, but some only support bits with 1/4 “shank. Try to use bits with 1/2-inch shank whenever it is possible. They offer better balance with less turbulence and usually deliver smoother cuts and longer cutting lifespan.
5. Avoid Splintering Wood
If you use a wood router with planks such as oak that have a large and powerful grain, the lumber can split easily if you do not take care of it. To minimize the risk of splitting, be certain that your bit is in decent condition and sharp, and if you can attempt to cut with the grain instead of against it. It would also potentially prevent splitting if you do multiple runs at a cut, instead of attempting to achieve the full length of the cut with one pass.
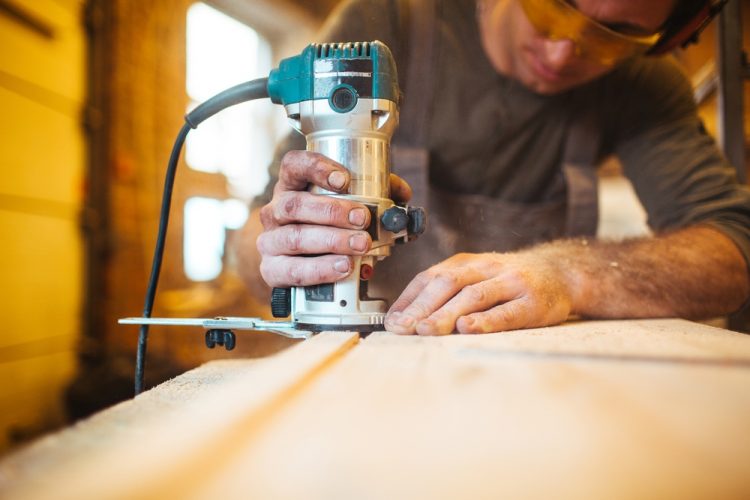
6. Routing the Edges
The secret of routing smooth edges with the use of a sharp bit is to pass the router back and forth across the top of the wood material. With this approach, the bit drives the wood router towards you instead of pushing it away, making it easier to manage and is much safer. But wood routing method in the counterclockwise direction does not always function perfectly. There is a risk for the timber to chip away from the corners. You can resolve the issue by cutting the outer grain in the “northeast” and “southwest” edges of the plank in the clockwise direction for a few inches.
7. Move from Left to Right
The most obvious mistake that carpenter novices make is that they progress the wood router in the opposite direction across the wood. You should push the wood router in the reverse direction to rotate for the maximum results, which will be from left to right if you use the wood router in a top position. If you’re doing this, you should find that the wood router has much greater control, and it won’t be going away from you. When you progress the wood router in the same path of the spinning of the bit, the router passes across the edge of the wood material, and you will have to struggle to maintain control.
Safety Tips
Like with every powered device, you must keep in mind several basic safety measures when using a wood router. You should require adequate protection equipment, including protective glasses to cover your eyes from flying particles and ear defenders to shield your ears from the noise–also go through the national guideline on woodworking safety. You also have to ensure that the bit is sealed tightly in the collet and that you have assigned router speed to match the bit that you will use.
After you are done, take good care of your wood router. Switch it off and keep it upright until it ends rotating, then lay it down before disconnecting it from power. Never attempt to detach the cut-offs when the device is in the use. Blow the leftover dust and wood pieces with an air compressor, detach the bits and return them to their original storage container.
Warnings
Any piece of machinery can be hazardous if not operated correctly. Keep your fingers and hands clear of the bits. Never handle the work surface with your free hand. For secure router table operating conditions, a guard should be installed on your work table that covers the surrounding area just above bit. Using a push block or push stick where possible to move the work beyond the bit. That is necessary for narrowed and smaller wood material and helps prevent damage to your fingers when routing big pieces as well.
Never turn up a wood router with the bit in connection with the piece of wood material. That can cause you to lose control over the wood router when going to work freehand. Launching the wood router when the bit is in contact with the wood can even fold the shank of the bit, or seriously damage the wood router. When the cut is complete, ensure that the bit is clean of the wood before turning off the wood router.
Conclusion
If you’ve never worked with a wood router earlier, you’ll be surprised how quickly you can accomplish professional-looking performance and how many various tasks this router could do. It is recommended that you start practicing on some wooden pallets before trying to use a wood router on real wood material. Wood routers operate at incredibly high speeds, and you can make errors quickly, but it will not take long to learn the technique of using wood routers.
FAQs
1. Can you use a router to cut wood?
Ans. You can also use a wood router to cut wood pieces, but usually, it was not used in the same manner as a jigsaw is. A jigsaw is frequently used freehand. A wood router is often used with a pattern or jig, apart from when used for edge cuts where the wood router bit has an orientation bearing.
2. Do you push or pull a router?
Ans. The bit circulates in a clockwise motion when looking directly down at the upper side of a wood router. That indicates you must move the wood router from left to right, which is only accurate when the wood router is placed between you and the wood material in the center.
3. How deep can a router cut?
Ans. When you cut a pattern, set the cutting and change the bit so that it is cut approximately about 1?4 inch deep. Consider cutting first and then decrease the bit and repeat until the pattern is cut at the optimal depth.
4. Should I buy a plunge or fixed base router?
Ans. If used with a routing board, fixed routers seem to be more favored over a plunge base router. They are easier to change the depth of the bits and appear to be more precise than plunge routers when retaining their sealed position.


