If you’ve ever worked with wood, you must be familiar with the challenges of achieving a flawless finish. While wood fillers are indispensable for repairing imperfections and gaps, they can present a visible challenge when trying to seamlessly blend them into your stained woodwork.
In this blog, we’ll explore practical techniques to master the art of hiding wood filler after staining so you can achieve a professional, polished look that makes those imperfections virtually disappear.
Whether you’re a seasoned woodworker or a DIY enthusiast, these tips and tricks will ensure your woodworking projects showcase the beauty of natural wood without drawing attention to the repairs.
What is a Wood Filler?
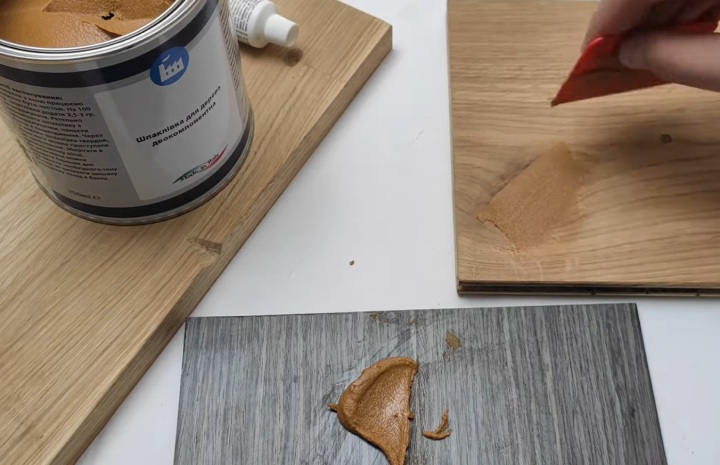
A wood filler is a paste-like substance used to fill up holes, gaps, cracks, dents and other imperfections in a woodwork to achieve a smooth finish with staining.
Wood fillers are typically composed of a filling material and a binder component (an adhesive chemical that keeps the filler together and helps attach it to the wood). For a professional wood filling job, the textures of the wood filler or wood putty are taken into account. You need putty with quality and in available colors to match the stain.
Some of the most used wood fillers are- latex, epoxy and urethane. Latex wood fillers are water-based and can mix with dyes. For larger holes and cracks, latex fillers work great on unfinished woods. For more durable options in both indoor and outdoor projects, epoxy and urethane wood fillers are preferable.
Why Hide Wood Fillers
Well, any hole in your furniture and other wooden stuff will ruin the aesthetics, right? That’s why you have to use wood fillers to repair the damage and keep the surface consistent.
However, after you’ve stained the wood, wood fillers can create a couple of problems. If you have used normal wood fillers instead of the stainable ones (which can absorb stains better and blend in well with the furniture), re-staining and re-furnishing can’t disguise the patched-up finishing.
The reason is that filler materials used in a normal wood putty are not porous. As a result, they don’t absorb stains well. So, when you finish staining, you’ll notice the wood fillers showing through the stain and disrupting the consistency of the finish on the woodwork.
On top of that, you won’t even get the look you wanted on your furniture. It simply means that an unnatural shade will be visible in those repaired areas that doesn’t match with the rest of the color.
To avoid these issues, hiding the wood fillers is important; not only because you don’t want a blotchy appearance on your woodwork but because you want a professional look as well.
How to Hide Wood Filler after Staining?
There are some techniques you can follow to save the day. So, if your wood filling was sloppy or you haven’t stained well, don’t worry, we have some DIY solutions for you..
Things You Need
- Wood putty
- Putty knife
- Gel stain
- High-grit sandpaper
- Low-grit sandpaper
- Sand Machine
- Bristle brush
- A piece of rag or cloth
- Stain Marker
- Paper towels
- Glue
- Pre-stain conditioner
- Protective finish or sealant
Not all of them will be needed for every method we are going to address here.
Once you’ve got all the necessary equipment, you can start working on hiding the wood fillers.
1. Sand Down
Woodworkers typically use sanding down to smoothen the surface of the furniture they build. For hiding fillers, you can use this method too. In fact, this is the most popular way to hide wood fillers after staining has already been done.
– First, use the high-grit sandpaper. Usually, a 220-grit is recommended but you can use any one more than 120-grit in this step. The high-grit sandpapers have fine particles and are usually used to smoothen the finished surface in woodworks.
You can use a sand machine instead. Sand the entire area including where you put wood fillers with equal pressure. However, you may have to put a little extra force on the filler since those areas are a bit harder to sand than the rest of the wood.
If you’ve already sanded the furniture while filling the wood before, this step is not necessary for you.
– Wipe the area clean with a wet rag to remove sawdust or dirt of any kind from the surface.
– Swipe your hand over the surface and try to feel any uneven spot. If you can find one, you need to repeat the sanding step.
– Put a coat of pre-stain conditioner all over the wood surface in the direction of the wood grains. Conditioners work by preparing the wood to accept stains more easily. After applying conditioners, the stain can seep into the wood in a uniform way
– You can allow the patch to dry overnight. If you’re planning to use latex or other water-based stains, you can put them in only 1.5 to 2 hours after the wood filler and the conditioner have been added. However, you can’t use latex fillers on outside applications.
Before applying, stir the stain to mix everything properly. Use your bristle brush to stain in the direction of wood grains.
– You can wipe off the stain immediately. But it’s recommended that you let it be for a few hours. That’s because the wood will stain better if you keep it longer.
After taking it off, you should let the wood dry for at least 4 hours.
If you want the stain to be darker, you can repeat the entire process.
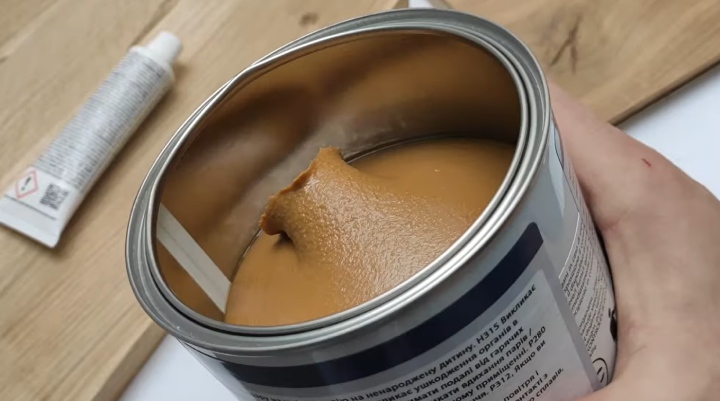
– You should rely on a high quality sealant or protective finish to save your wood from dampness
by liquid or gas and to give you a thick and moisture-resistant finish.
Stir the can for everything inside to mix properly and then use the brush in the direction of wood grains. After you’ve covered the whole surface this way, apply some long brush strokes to even out the entire furniture. Let the protective layer dry for a few hours.
– Once the layer is dried out, pick up your low-grit sandpaper now. It can be from 80-grit to 120-grit to be precise. These sandpapers have coarse particles and help smooth out the rough edges on the furniture. Sand the whole surface with it. This will smoothen the first coat of stain. You can apply more coats depending on your need by repeating the steps V-VIII.
2. Gel Staining
Gel stains are usually thicker than regular stains. As a result, it can cover the imperfections on woods well enough when used right. It also doesn’t seep in too deep into the wood grains. So, only a thin layer of gel stain can give your furniture a consistent look. It’s even better if you use dark-colored stains but obviously, it has to match with the rest of your wood.
– First make sure that the wood filler is totally dry. A wet filler can absorb the gel stain and create a dark spot on the wood.
– Apply a thin layer of gel stain right over the wood filler with the rag or a bristle brush. Make sure any excess is wiped out after. Otherwise, the stain will pool into the filler.
– Before applying the finishing coat, allow the stain to dry completely.
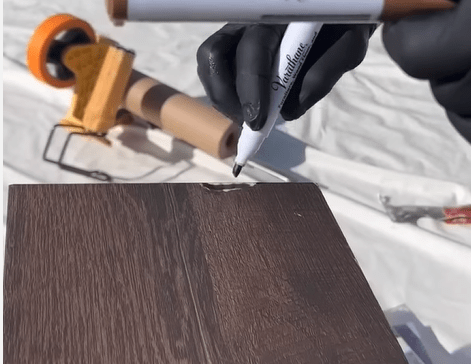
3. Wood Finish Stain Marker
The easiest way to prevent the wood filling from showing up is using a wood stain marker. A marker is just like a pen that you can use directly over the filling areas and even scratches. All you have to make sure is that the color of the marker and its shade is identical to that of the furniture.
– Use the 220-grit sandpaper to smooth out the area where you applied wood filler. Keep sanding until it is level with the rest of the surface.
– Pick the right marker with appropriate color. Shake it well and open the cap.
– Mark a thick layer of stain right over the filler and keep it that way for a couple of seconds.
– Use the rag to dry the excess stain. Avoid rubbing as it can lead to the stain spreading across the entire wood. You should rather polish the area gently in circles to get rid of the excess.
– Close the cap.
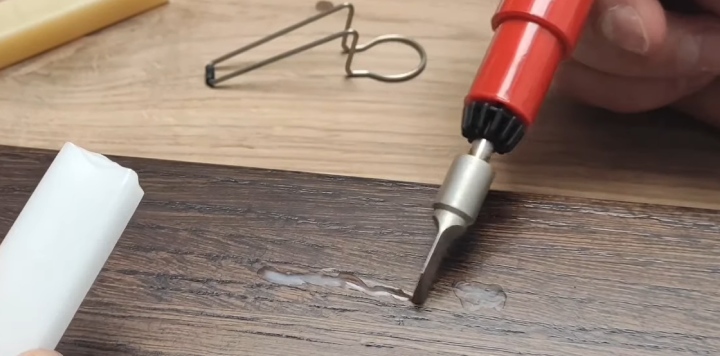
4. Paste Wax

When wondering about how to hide wood filler after staining, remember that wax is an environment-friendly way to go about the process. They’re also easy-to-find and can be used for quick fixes of the wood.
– Choose a paste-like wax. Remember to pick a wood-colored one to match with the surface.
– Apply a thin layer of wax on the wood filling blemish.
– Finally, put the sealant or the protective finish on.
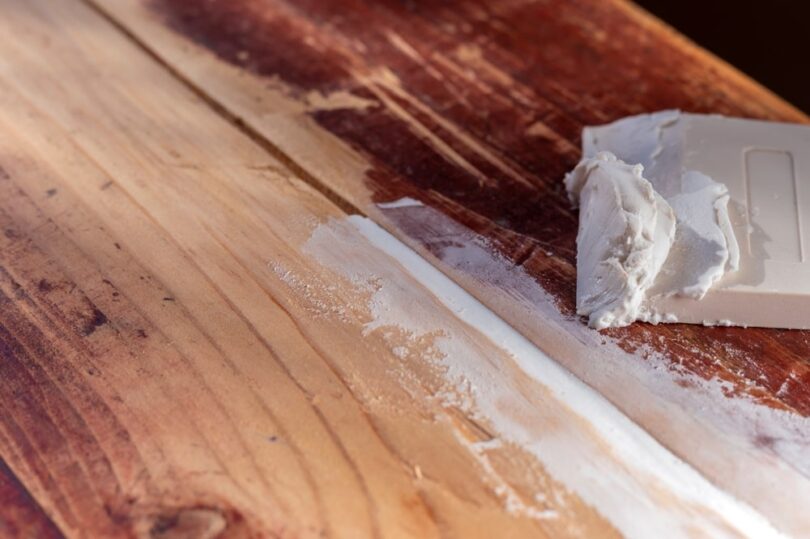
5. Wood Putty
Many think that wood fillers and wood putty are the same substances. But there is a distinct difference between the two.
Wood fillers have filling materials (fibers, cellulose or gypsum) and binders (adhesive polymers). On the other hand, wood putty mostly includes plastic-and oil-based binders along with saw dust or wood dust as the filling. As a result, wood putty is softer and so widely used in small repairs like filling up a crack on furniture.
– Your wood-putty has to be of the exact same color as your furniture. So, choose carefully.
– Use the putty knife to scoop out and apply the putty over the filler. If the putty doesn’t fit in at first, you can firmly push it into the filler.
– Smoothen the surface until it’s level with the rest. Let the putty dry.
– If your putty is made of glue and wood chips, you can further sand down the area for smoothness. However, if its components are mostly oil-based or plastic solvents, you can’t sand them.
6. Recycling Inlays from the Same Woods
It means to simply attach loose pieces of wood from a furniture back into the fillers of the same furniture to make the whole surface uniform.
– Cut small inlays from the same piece of wood. The grains of the inlay should be consistent with the grains around the filler.
– Glue the inlays on the filler.
This method doesn’t ensure that the wood fillers are completely hidden. It just keeps them away from regular eyesight. If somebody inspects your furniture closely, they’ll still be able to notice the marks left by the fillers.
7. Wood Glazing
You can add a glaze over the whole surface, including the filler to both hide the gaps and make your wood look glossy.
– Make sure that the surface is clean and smooth. Sand one more time if necessary.
– Select a glaze of your choice. You have to ensure that it’s compatible with the wood you’re working on.
– Apply the glaze using a brush or a cloth evenly across the surface. The brushing has to be in the direction of the wood grains.
– Let it sit for a while, usually 5-15 minutes. Then, wipe out any excess by using the rag with a little pressure if necessary.
– Finally, dry the wood and enjoy the glow and smoothness! You can add more coats over the glaze to get a dark or deep color.
8. Paint Over
You can directly paint over the wood to hide any type of blemishes, including wood fillers. You don’t have to remove the original stain to achieve that. In fact, if your finish is water based, you can paint over the wood even without sanding again. However, if the finish is oil-based or thicker, you have to remove the entire coating and sand down again to get the painting right.
9. Top Coat or Sealant
Simply a finishing coat or sealant can also hide the fillers well. But remember to pick a colored coat. Transparent coats like the water-based polyurethane stains can’t prevent the fillers from showing through.
10. Start Over
If none of the methods have worked for you still and you can afford the expense and time, it’s better to remove every coating and start from the beginning. This is because the methods we’ve listed so far may hide the grains and original stains alongside the fillers. Sometimes, you want the woodwork to be raw and showing grains through the finish. In those instances, you should try working with the wood keeping account of everything.
Tips to Avoid Wood Filler Issues
Wood fillers can show both before and after staining. If you are familiar with the possible problems, you can prevent or at least minimize their presence during the woodwork.
- Paint and stain over stainable wood fillers to get the best results. If you stain over regular wood fillers, the finish will look blotchy and messed up despite your best techniques. Sometimes, these stains peel off from regular fillers.
- Select the right wood filler. If you are using water-based stain, then put water-based fillers. In this way, colors will be evenly absorbed and no blemishes are likely to come out.
- Before putting in wood fillers, you can mix it with the stain in a separate container. This can alter the shades of the wood filler and create a match.
- Use dark and deep stains. This is a safe option for any type of wood since the darker colors will definitely hide any type of minor fillers from prying eyes. Thick stains like gel stains work the same way.
- You can try adding sawdust or wood dust to the fillers as well. This can help improve chances of getting a uniform texture in both the filler and the wood.
- Make sure you’ve provided an even coat of stain over the area.
- Don’t hurry while staining. Give each stain enough time to dry out.
Accidents may happen anytime. You can still have wood fillers hampering your consistency. But following these simple tips, you can at least reduce the possibilities of wood fillers showing through your finish.
Final Thoughts
If you don’t like to see blotches and patches on your finished furniture, you now know how to hide wood filler after staining.
You can alternatively use different methods to disguise these fillers- whether by sanding them down over and over again or applying gel stains or glazes or using gel stain markers or wood putty.
The most important thing about the process is being aware of the possibilities. Our article will help you know the facts and tricks but you’re the one who has to stain. So, be smart and good luck with your woodwork.
FAQs
Q. Does wood filler stain the same as wood?
Ans. Even the stainable wood fillers won’t stain exactly as natural woods. This is due to their ability to absorb liquids. They can cover the damages but can’t stain 100% as good.
Q. What if wood filler Isn’t Staining?
Ans. That’s because you are using a regular wood filler. In that case, you can sand down repeatedly to make it stain better.
Q. Which Types of Wood Stain Should I Use Over Wood Filler?
Ans. Depends on the wood filler. If the filler is water-based, then it’s recommended that you should use a water-based wood stain as well. Water-based stains are normally better than other types such as oil-based ones.
Q. Do I need to seal the wood filler before staining?
Ans. No, it’s not necessary to seal the wood filler before you apply stains. Just make sure that the properties of the filler and the stain match. This will help both to absorb colors evenly.
Q. Can I use wood filler on stained wood?
Ans. Yes, you can, However, you should make sure that the color of the wood filler matches that of the stained wood.
Q. How long does it take for the wood fillers to dry?
Ans. Typically, wood fillers take up to 2 hours to dry. But if your filler goes deep enough, it might need to dry for about 6 hours.
Q. Can pre-stain conditioners hide wood filler after staining?
Ans. No, pre-stain conditioners can’t directly hide wood fillers. The conditioners are applied before the stain. They help absorb the stain better and hide the fillers well.
Q. Can I Paint Over Wood Putty?
Ans. You shouldn’t paint over wood putty. Try to match the color of your putty to that of the wood.
Q. Are wood filler and grain filler the same thing?
Ans. No. Grain fillers are better in efficiency and more expensive.