If you are an avid machine parts collector and like to engineer tiny electrical stuff then you may have heard about CNC router. CNC router is a computer controlled cutting machine and quite costly to purchase. So, building your own CNC router would surely be worthwhile. Below, homemade CNC router plans explained.
A CNC router provides high efficiency and precise work and improves productivity. Automation and precision are the two best benefits you can avail from this machine. So, you must be interested in knowing how to make a CNC router on your own as it will help you save a large sum of money and the trouble of frequenting stores to make your purchase.
In this article you are going to get the following info to assist you in constructing a home built CNC router in case you do not have enough budget to buy the best CNC router on the market:
1) Construction and implementation of DIY CNC Router
2) CNC Router Kits and Plans
3) Step-by-step guide on making DIY CNC Router
Understanding the Construction of the CNC Router
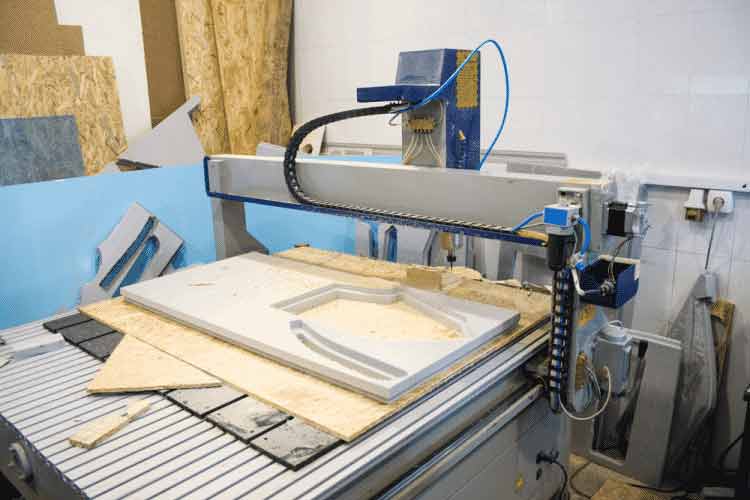
A CNC router may look a very complex machine to you at first sight. But, in fact, it has a simple build while considering the simple mechanism of a cutting machine. The CNC router features computer-controlled hand-held router that predominantly used for cutting several hard materials.
Just think of a milling machine that includes a sharp cutting tool. Those machines often need to get controlled by hand, but a CNC router fully operates through computer numerical control, stepper motors, control cabinet, jog buttons, spindle controls. This machine also works on the Cartesian Coordinate System for 3D motion control.
So, this machine is applicable for avid engineers, product development, art with production works and hobbies. Next up, we are going to introduce the implementation of DIY CNC router.
Homemade CNC Router – The Builder’s Guide
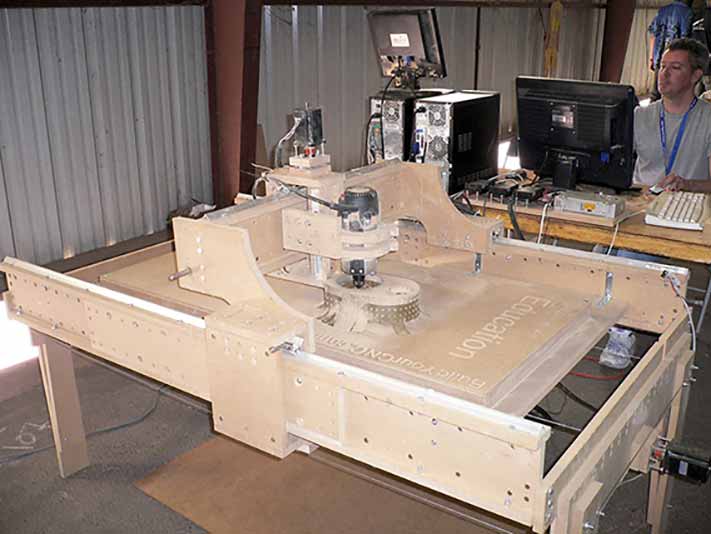
When you think that you will build your own cnc machine, it may seem a daunting task as it has different complicated parts and flexible structures. You may encounter several issues while implementing DIY CNC Router while building for your own usage. So, what types and kinds of linear bearing and material is the best and is it affordable?
You need to consider researching on the internet, finding the best tools and parts according to your budget is the main factor many fall behind building their homemade CNC Router. Another fact is, CNC Router takes quite a bit of space in your home, so you may need to have a bigger space considering the router size.
CNC Router Kits and Plans
There are lots of homemade CNC router kits available but you need to choose the design based on what kind of cutting works you are going to perform. You will find a lot of information about how to build a CNC machine but you should follow the proper design that goes in your way.
So, planning and arranging for the proper parts and kits is superior over starting for home-built CNC router making.
Step-by-Step Guide
So, are you on track to make your own homemade CNC router? If you have the proper tools and parts with the proper arrangement then you can follow our comprehensive guide to step onto constructing a CNC Router. Following, a three Axis CNC router making explained.
Step 1: Gathering the Required Tools and Parts
There are some of the tools and parts you need to collect prior to start the making process. First, collect Dremel or Dremel Type Cutting Head tool for a three axis CNC Router making process. For the three Axis you need to have different specification. Follow the axis details and parts required.
- X-Axis: It contains 14-inch travel, the drive has toothed timing belt, speed 60-inch per minute, Acceleration has 1-inch speed, resolution: 1/2000-inch and pulse per inch is 2001
- Y-Axis: It contains 10-inch travel, the drive has toothed timing belt, speed 60-inch per minute, Acceleration has 1-inch speed, resolution 1/2000-inch and pulse per inch is 2001
- Z Axis (Up Down): It contains 4-inch travel, the drive has threaded rod, speed 12-inch per minute, Acceleration has 0.2-inch speed, resolution 1/8000-inch and pulse per inch is 8000
- Power Tools: You need to have Band saw or scroll saw, Drill press, printer, Drimel or similar tool for finished machine works
- Hand Tools: Collect Rubber Mallet for the purpose of providing ‘persuasion’ when it requires, Hex Keys, Screw Driver, Glue Stick or Adhesive Spray and Adjustable Wrench
- Sheet Stock: Collect a 48×48-inch piece of ½ -inch thick MDF and a 5×5-inch piece of ¾ -inch thick MDF. It will be used to male spacers
- Motors and Controllers: You need to have a controller that can control three axes and that includes pulsed step and direction inputs. The motor should include 100 oz per inch torque holding
- Hardware: The conventional parts for making the CNC router can be found at Home Depot and CNC needs a large number of bearings; you can order them easily online
- Software: CNC router making requires a software program to draw the designs; you can use CorelDraw to draw the design
Step 2: Printing Pattern Method
Next step is pattern making. Choose the pattern according to your taste. If you have a better experience using scroll sawing then use glue on pattern method. Just draw your preferred design by CorelDraw or any better software and print out the files onto tiled pages.
Step 3: Attaching & Pattern Gluing
Coming up is to stick glue on the MDF stock board and Aluminum Tubing. Just glue the pattern and stick the design onto it. Follow the process,
- Glue down the tiled pages to the sheet stock and Match the edges on the board
- The pattern should get glued to both sides of aluminum tube, if you notice that the Tube placed flat on the table and you attach the side with the upper side, you can glue either side
- Use glues as much as you can
- Have some glues close to you to apply faster
Step 4: Cutting Out Pieces
This step is pretty easier; you just need to cut the pieces according to the outlines you have drawn or design on the board. You simply need to cut around every single outline, but make sure you don’t get away from the outlines.
Step 5: Drilling Perfect Hole
This project requires a lot of holes to create according to the shape and size of the board. Drill the holes according to the design you have created and make sure, the edge of the material gets drilled up with caution.
- You can start by applying Dykem where you need to create the holes
- Use a scribe to spot the holes location including two traversing lines
- Use a smaller transfer punch to spot the location of all holes
- Use center punch placing in the dent made solely by the transfer punch
- With the tip of the drill, mark the center and get the drill bit work the rest
- Clamp the part, turn the drill press on and slowly move drill bit down
- Make sure you dent the center properly and bring the drill bit back up
- Follow the peck drilling technique to drill, it is a common CNC technique
- Tap a hole in the cutting threads into a part, it ensures you can fasten screws
- Make sure tap is clear of parts of debris or uses the air compressor to fly those away
Focus on timing and hole the sections with overlapping attempting to craft the grooves, in case you plan to get a table router, it will operate even better for this.
Step 6: Assembling the Pieces
Have you reached this end yet? If you get here then you will successfully make it through to the next section. You need to assemble all the hardware and tools required for assembly. Just put hardware according to the design you have drawn. Follow the process below for belt clamping:
- Place belt clamp to the end of each three lengths of the belt for Y-Axis
- From the front belt holder, thread belt through the hole
- In Y-block holder, thread the belt through the gap
- On the front shaft of the bearing’d bolt, thread the belt under
- Attaching to the Y-axis drive shaft, run the belt up and over the pulley
- Operate the belt down and around the back bearing’d bolt
- Thread the belt through the hole or gap in the back Y-block holder
- With and eye bolt, loop the belt and clamp it with clamp belt
- Place the eye-bolt in the hole of the back belt holder and attach the nut
- Keep tightening the nut until you see the belt gets tightened enough
- Use similar threading path for the X-axis
STep 7: Wiring & Software Control
The electronics of the router includes central power switch, power supply switch, stepper tools, motor controller instrument, power relays tool, stepper motor cables equipment, outlet hub and e-stop. You can add controlled switches and cable carrier equipment. Buy a standard power cable and male outlet plug; this will get connected to the central power switch that includes a red pointer light.
The power supply consists of 48 volts DC 12Amp supply. Power flows to the power supply and relays while switching on the 110v AC. The relays mainly use here to powering on the router. On the other hand, every stepper requires a resistor between pins 1 to 5 to have controlled power flows to the stepper.
The motor stepper tool gets connected to pins with 6 to 9 of the wired connector. Make additional cables for the stepper motor tool assembled at the end point of DB9 including cat5 network cables.
On the other hand, you can use the software Mach3 to control and operate your CNC router . This software made solely for the CNC-based router with G-codes and send output signals by the analogous port on the computer directing to the G540. You also need your designs to get converted into G-code language with CAM software.
Step 8: Finishing
The machine is now ready for a test run. When all the parts are properly hooked up, you can start with mach3 and later go for widgets. Hopefully, you have finished building your own CNC machine. If you think the machine needs to be built with more potential components and instruments then you can try additional methods.
To conclude, the method used here is quite easier to implement and more convenient than other homemade CNC router plans. Just follow the pattern and design you create and assemble all the parts according to the design. If you are a geeky hobbyist who loves playing with tiny parts, this homemade CNC router plan will surely electrify you.


