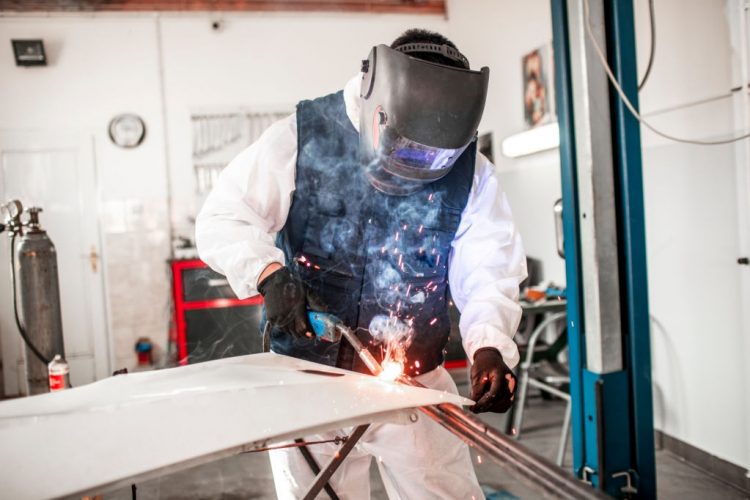
It doesn’t matter whether you are using a tig or mig welder, the right helmet with auto-darkening feature can take your game to a whole new level. If you’re going to use an auto darkening welding helmet, you need to make some preliminary adjustments. That way, you can get a more comfortable experience. Things like shade, delay and light sensitivity define how your welding helmet works. So, making the right adjustments at the right time can help you be more efficient.
If you want to learn how to use your welding helmet as an expert, you’re in the right place. Today, we’ll show you how to adjust your auto darkening welding helmet.
The Basic Controls of an Auto Darkening Welding Helmet
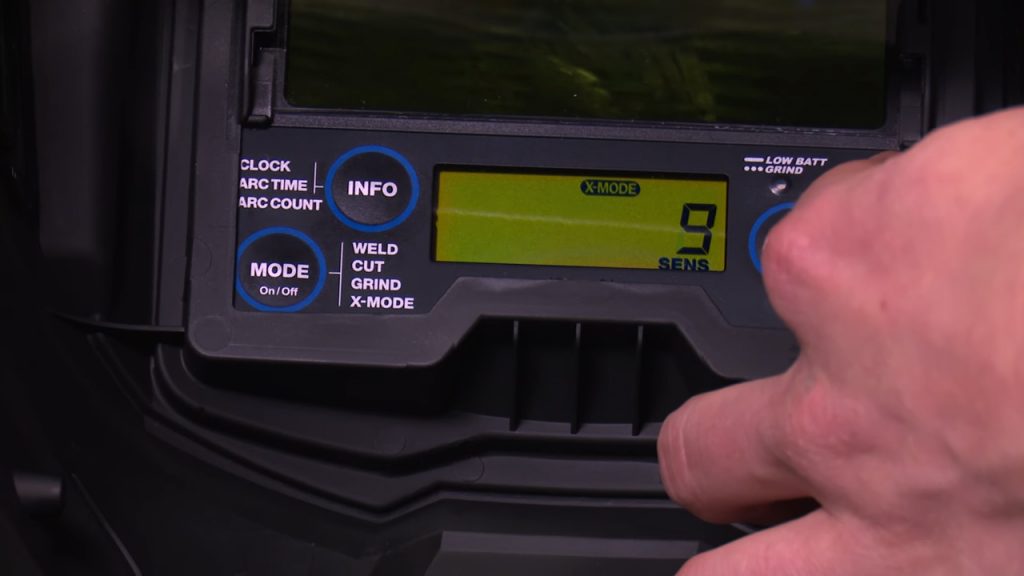
Light sensitivity
The light sensitivity control determines how intense the arc light should be to darken the lens. Usually, the brighter the light source, the darker the lens becomes.
Delay
The delay control determines how long the lens takes to go from dark to light. When the welding arc is very powerful, the molten metal emits an intense bright for a longer time. In these cases, you need a longer delay time, so your eyes stay protected.
Shade
The shade control determines how dark the lens becomes in the presence of arc light. In these cases, a numerical scale from 1 to 14 defines the shade. The higher the number, the darker the lens.
The Importance of Control Settings
Certainly, control settings are very important. They add versatility, letting the welding helmet to adapt to different work conditions. In addition, they provide comfort, letting users to modify certain features at their own convenience.
Auto darkening welding helmets also increase user efficiency and productivity. With passive helmets, the user should toggle between a shade 10 and 12 to finish the job. That time the user loses by changing the lenses delays the job.
On the other hand, with self-darkening helmets, the user doesn’t waste time and keeps focused on the job.
How to Adjust Auto Darkening Welding Helmet?
Light sensitivity
Before getting started, you should find a clean and well-lit place to locate your welding helmet. Then, check the correct installation of lens and batteries. If everything is ok, you can continue with the adjustments.
To adjust the light sensitivity, you should turn the corresponding knobs. Usually, the higher the amperage you use, the higher the light sensitivity should be. It’s also convenient to make a test to verify the light sensitivity is right.
Delay time
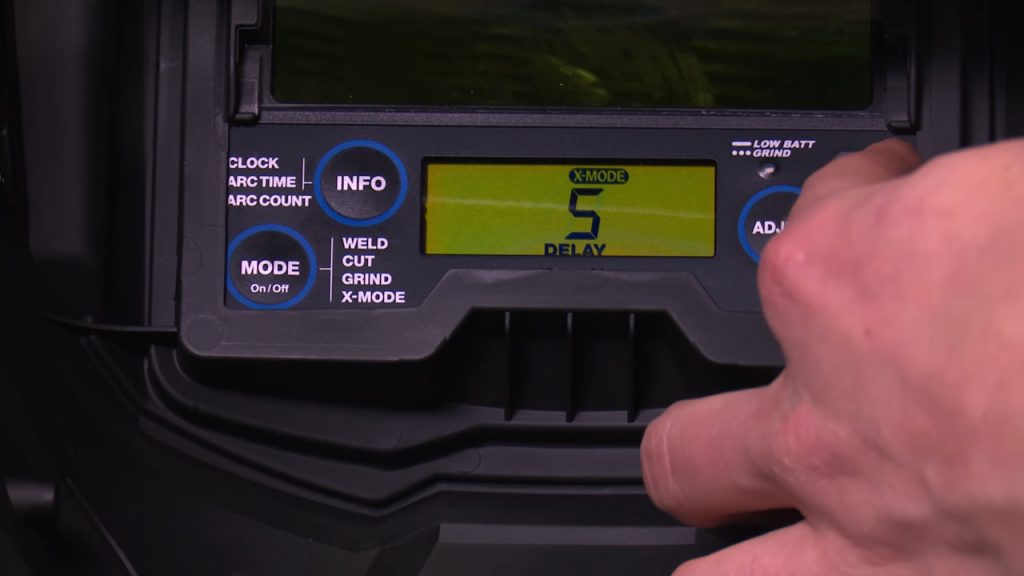
As said before, the delay time defines how fast the lens goes from dark to light. In these cases, the higher the amperage, the longer the delay time. Usually, the delay time switches are on the inside part of the helmet. So, they’re always protected from any welding debris.
All you need to do is move the switch to adjust the delay time. If you suffer from sensitivity or burning eyes, it’s convenient that you set the delay time to the maximum.
Shade
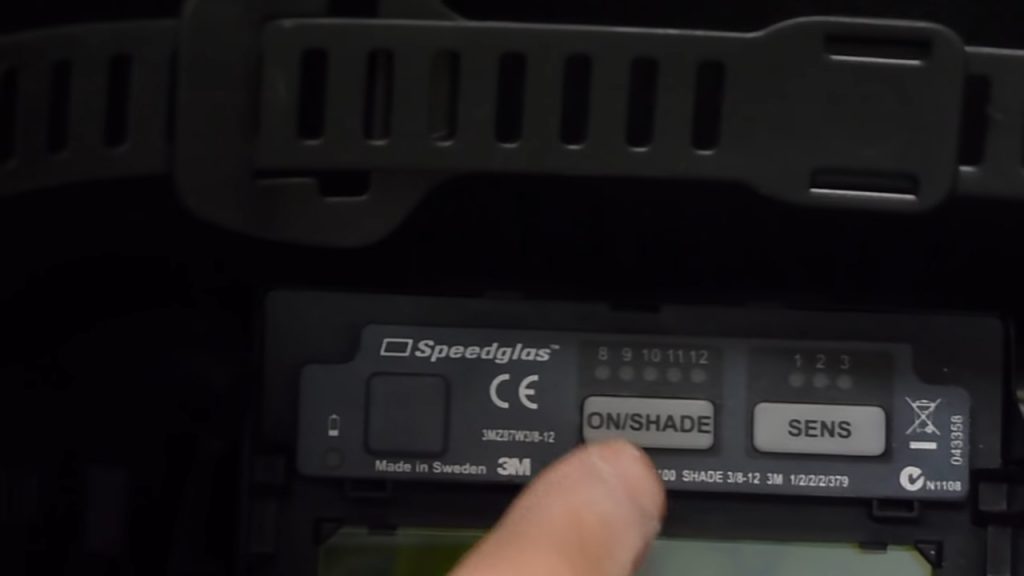
Usually, the shade adjustment controls are also in the inside part of the helmet. With them, you can decide how dark the lens becomes in the presence of a welding arc. In these cases, the higher the amperage, the higher the shade.
A shade 14 guarantees maximum protection in all circumstances. However, it may difficult your vision when working at a lower amperage. So, it’s convenient make a test and vary the amperage progressively. That way, you can easily determine the most appropriate shade level in each case.
Memory
Some models of welding helmets have a built-in memory. That way, you can store different settings for different kinds of work. This option is very convenient for professional welders, who often work with the same amperages over and over again.
This feature also saves lot of time. The user won’t have to adjust the controls every time a new job begins. By pressing a few buttons, the helmet is perfectly configured and ready to work.
Consider the working location
When you’re setting up your welding helmet, you should also consider external light sources. For example, sunlight or arc light from other welders around you. In those cases, it’s better to choose a lower light sensitivity.
Working under direct sun exposure may be uncomfortable with a high light sensitivity. You’ll end up working in the dark most of the time.
Testing and Reading the Welding Helmet Controls
After making the necessary adjustments, you should test the fit of your welding helmet. First of all, make sure the helmet perfectly adapts to the shape and size of your head. That way, it won’t move during work.
Also, the lenses should cover your entire eyes. Make sure the arc light isn’t visible through the sides of the helmet. Any light passage can cause permanent damage to vision.
Depending on the model, the adjustment controls can be on the external or internal part of the helmet. Older models use knobs and switches for this purpose. However, these controls are very difficult to manipulate in dark environments.
On the other hand, newer models use illuminated touch panels to control all the features of the helmet. They’re more convenient, because you can make any adjustment regardless of the external lighting.
Conclusion
As you can see, you don’t need to be an expert to learn how to adjust an auto darkening welding helmet. Certainly, practice and experience is the secret of a proper adjustment. So, try different settings to determine which ones are the most convenient for you.
FAQs
1. How dark the welding lens should be?
A. It all depends on the used amperage and the job site conditions. Usually the more intense the arc light is, the darker the lens should be.
2. Are auto-darkening welding helmets safe for your eyes?
A. Yes. They protect your eyes from permanent damage caused by arc light and welding debris.
3. Can auto-darkening helmets get damaged?
A. Yes. Over time, the welding lens tends to fade. Also, the helmet may rust with high humidity levels or break with high impacts.
4. Can you look at the sun with a welding helmet?
A. Yes. But the lens should have a shade 12 or higher to be safe.
5. How to know if an auto darkening welding helmet is working?
A. If the lens is dark in the presence of intense light, the helmet is working well.


