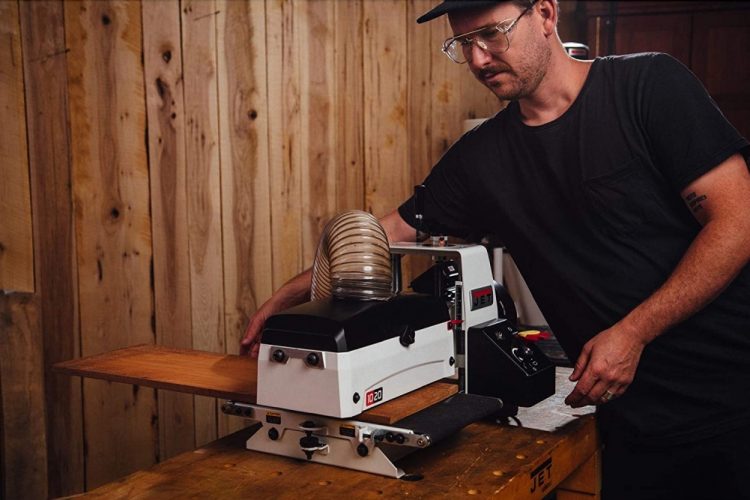
Sanding is not the best part of woodwork, if we are being honest. It is easy to make a mess of it and use the wrong techniques. Besides all of that, buying a drum sander will make quite a dent in your purse.
This is the reason we’ll show you how to make your own DIY drum sander with items in your garage.
Drum Sander Parts
DIY sanders require a few important parts to work correctly. Be sure that you have all the parts you need before starting to build and do not forget to wear your personal protective equipment (PPE).
- Drill press: In this case we are mounting a DIY drum onto a drill press. This allows an easy build and does not require you to be a professional electrician and carpenter to build
- The Drum: This part of the sander is what sandpaper is attached to. It does all the actual sanding.
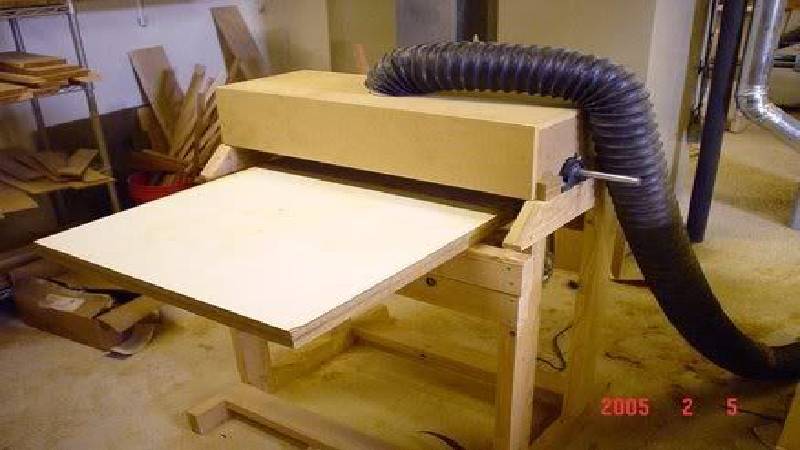
- Dust Collector: Unfortunately, with most simple DIY drum sanders, this is not a component. This is simply because there is no space or way for one to be attached. They are present in manufactured and oscillating drum sanders, however.
- Motor: More sophisticated DIY drum sanders require a motor to operate. Luckily for us, the motor is built into the bench press.
DIY Drum Sander – Step By Step
Required Tools and Materials:
Before we get started, we need to gather the basic tools and materials that we will need to complete this machine. Do not forget to wear your PPE and practice safety when you build your drum sander.
Tools:
- Sanding drum
- Framing Hammer
- Hole saw kit
- Circular saw
- Clamps
- Drill press
Materials:
- Wood glue
- Plastic laminate
- Velcro
- ¼ inch plywood
- 1×4
- ¾ inch plywood
Different designs might require different materials and care should be taken to be specific in the materials that you are buying or salvaging.
Steps to Follow
1. Mounting the Drum
The drum itself can be made using a piece of scrap wood and some sandpaper. You can use any grade of sandpaper for this, it is all up to you and your woodwork.
When deciding what drum to make there are 3 options:
- Dowel: Some dowels are quite large in diameter and can be used to build a handheld sander, because it can be quite difficult to drill it in the center for a place to mount tools. The length should be cut to a length that allows a handle and space for sandpaper.
- Bench drill: Using a large drill bit, drill a hole through the center of a piece of wood. Centrally attach a bolt with a big washer on either side of the drum. This can then be mounted into your bench drill.
- Lathe: Having a lathe saves you some work. In the case that you have one, you can attach a little stock in between the centers of the lathe, turning it into a drum.
Larger sanders can be used on a lathe compared to those that can be used on a bench drill. Make sure you consider the bench drill’s capability before using it.
2. Attaching Your Sandpaper to the Drum
After you have decided which way you are going to use your drum, you can focus on attaching the sandpaper. There are a few ways that you can do this, but if you plan on using different grades of sandpaper often, then Velcro is the recommended material.
- Glue: Wood glue can be used to attach different grades of sandpaper to multiple drums that you have made. If you prefer one use drums, then this is the way to go. The downfall is that you will spend more time making multiple drums for multiple grades of sandpaper. You will also have to change drums whenever you want to use a different sandpaper grade.
- Velcro: You can use glue to attach Velcro to your drum and the back of your sandpaper. This makes them interchangeable and you can swap sandpaper either when it wears out, or if you require a different grade for the current work that you are doing.
Mistakes to Avoid
Common sanding mistakes include:
- Using the wrong grade of sandpaper can seriously damage the hard work you have done. Make sure that the grit you use is the right one for the job at hand
- Uneven sanding is a problem that can be caused by using the wrong techniques.
- Always inspect your work during the sanding process! Not inspecting your work can lead to a lot of avoidable mistakes that can make your finished product look rushed.
- Improper edging is a mistake that can be avoided. Unfortunately, drum sanders are not ideal for edges, but edging is doable with the right technique
- Not wearing personal protective equipment is a recipe for disaster. Avoid unnecessary trips to the doctor and practice safe sanding
Conclusion
If you practice enough you could be a professional sander in no time without the need to break your bank. Use what you already have and make a fully functional drum sander to brag about. Always consider your safety as well as that of others. Happy sanding!
FAQs
1. Do you push or pull a drum sander?
Ans. When ready to use the sander, it should be pushed to start it moving. The drum should then be lowered onto the floor. You should expect the device to pull you towards it when contact is made between the drum and the floor.
2. Can a drum sander replace a planer?
Ans. Drum sanders work well at sanding wood and fine surfacing, but they cannot perform abrasive planning as well as planers can. They are simply not the ideal tools for removing large pieces of wood.
3. Can you go against the grain with a drum sander?
Ans. Average drum sanders will leave behind distinct marks if used against the grain. To get a smooth finish, a rotary sander is needed. These are sometimes rented out with a drum sander and will require a lot of hard work to use in this situation.


