
Miter cuts are one of the most famous woodworking joints. They are strong and durable if done right. There are multiple ways you can use miter joints. If you’re one of the beginner woodworkers or are interested in learning the basics of miter designs, you are at the right place.
Miter joints are mostly seen in picture frames, door borders, and window casings, among all other places. Today, we’ll discuss the basics and some of the most widely used miter joint techniques. Join us as we introduce you to the world of miter joints.
Miter joint basics
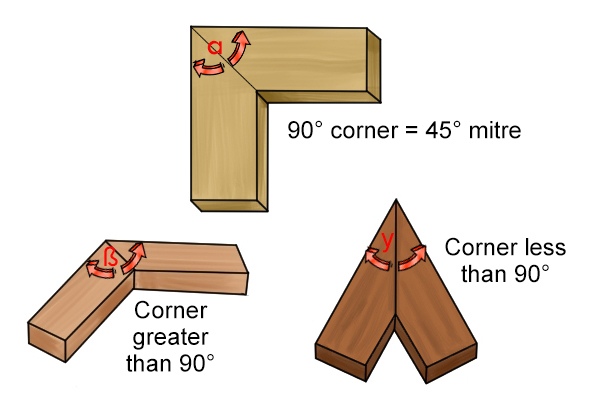
Miter means angled cut. When two 45° angled pieces are joined together to form a 90° angle, people call it a miter joint.
There are varieties within the miter joints and some of them deal with different degrees of angles. For instance, an octagonal layout requires 22.5° pieces.
Miter joints are commonly visible in the picture frames, window casings, and door borders. These joints are tougher than butt joints as the pieces are attached throughout larger surfaces.
Tip: Make some small adjustments when you need to; since most big frames might not be precisely 45° sharp or there might be small contrast in drywall or other building resources.
7 Popular Miter Joints and How to Form Them
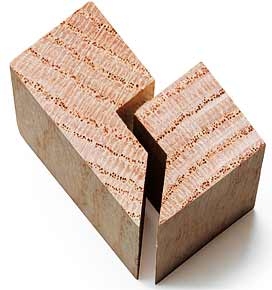
1. Mason’s miter

Mason’s miter joints are secure, have clean unceasing appearance, and waste less material compared to regular 45° miter joints. This type is conventionally used in masonry or stonework, and woodwork.
There’s a recipient constituent and an intersecting constituent. In easier community terms, the receiver piece is called a female, and the intersecting unit is a male.
Their applications include constructing laminate kitchen worktops, cabinetry, corporate tables, and so many other wood and laminate works.
How to cut a mason’s miter?
In a mason’s cut, two elements will meet the same way as in a butt joint but a socket (a small portion) is sliced out of one piece so the end of the other segment can fit in.
A small miter is made beforehand on the inside edges of the socket and the outer end of the intersecting fragment so the edge treatments can be carried out.
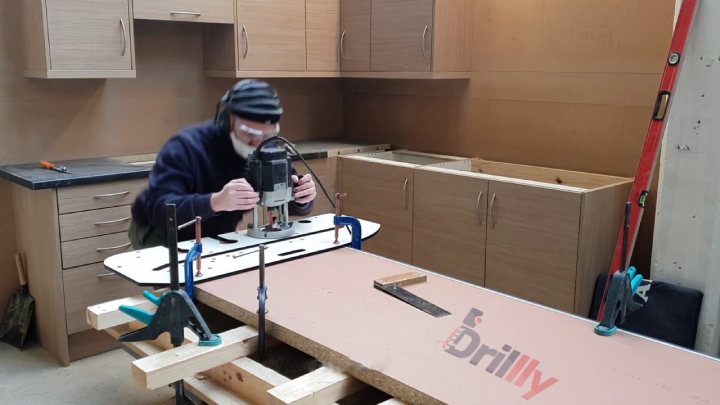
You’ll need a worktop router jig up to 700 mm/900mm wide, an equally strong router, G clamps, and router cutter.
Firmly fasten the jig to the worktop and cut it. Finish the joint with your hands and rub on some sealant to the worktop joint to make it water-resistant.
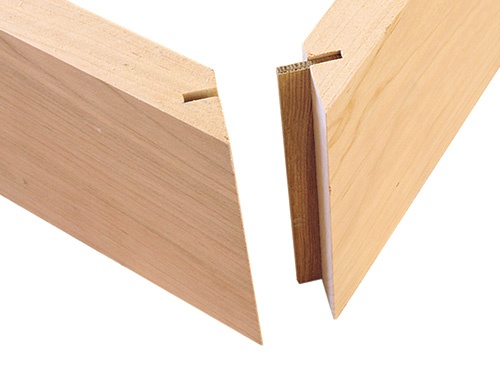
2. Locked Rabbet Miter
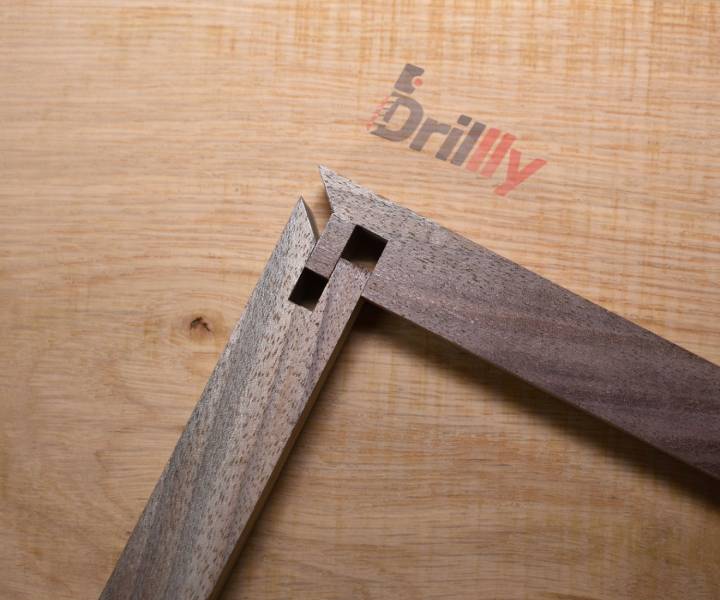
It’s a modified stronger joint that has miter on the outside and the sections fit together like a puzzle on the inside.
Locked rabbet miters will be rock solid when the pieces are perfectly glued and placed together.
How to cut a locked rabbet miter?
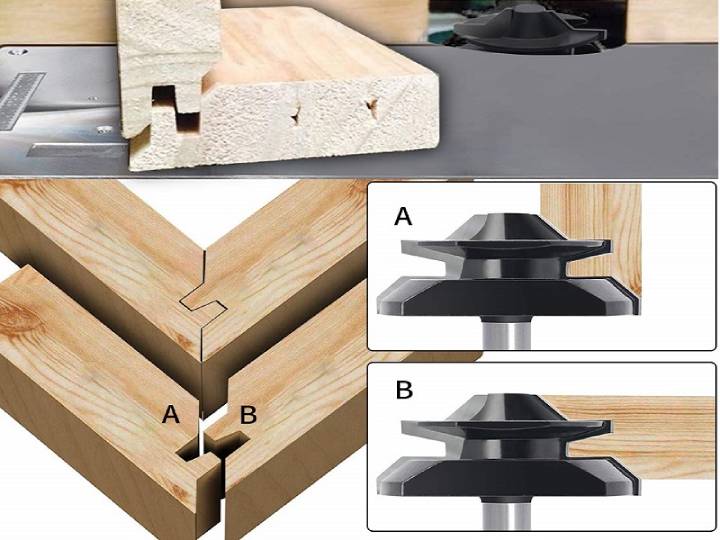
Get your pieces milled and marked first. Use a ripping blade with a slightly flatter tooth on your table saw to get the cleanest cuts. You can also use a locked rabbet miter router bit to get the cut in one move.
Set the blade at a similar height to the thickness of your workpiece. Grab a block of plywood and clamp it to the fence to avoid kickbacks while making cuts.
Hold the pieces together at a 90° angle and carve grooves right down the center of the pieces. Then cut a miter at the tip of both the pieces and they should be perfectly placed in each other.
Check out this video and notice every detail to get a perfect locked rabbet miter joint for your project.
3. Rabbeted Miter Joint
It’s somewhat similar to a locked rabbet miter joint, except that it doesn’t have the grooves or the interconnecting piece that makes it simpler to create.
How to cut a rabbeted miter?
Get your boards ready and marked as 1 and 2, mark out the rabbets at the end of each piece.
Leave the rip blade on the table saw at the same height as the depth of the work pieces and make some clean cuts. One piece will have longer rabbets than the other.
Tilt the blade at 45° and cut the miter on the edges after you’re done with the rabbets.
4. Hidden Spline Miter
You’ve most likely seen miters with splines on them from the outside. A hidden spline miter comes into play when you don’t want those splines on the external side of the joint.
A miter joint may be decorative but isn’t considered strong enough by itself, so the hidden splines could add some extra strength.
How to cut a hidden spline miter?
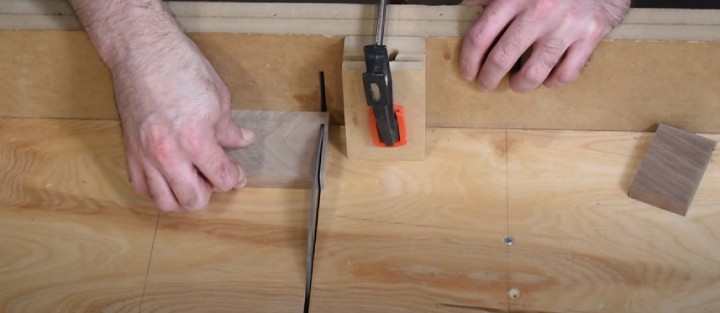
Take a thick board and trim off the slices off the end to make the splines you’d need. Set the blade at 45° and have your work pieces ready to go.
Cut the miters on the ends of all your pieces using a gauge. Put the joint together and use a strip of painter’s tape on the joint to do the layout marks for the splines.
Cut out a notch right through the mitered surface slope using the table saw for the splines that will be inserted into the joint.
Set the combination square to half the thickness of the board and put it up against the joint and make your mark.
Reset the square to 45° and mark a line all the way across. Use a miter gauge and tilt your blade to 45°. Lower the blade down a bit so you don’t cut all the way through.
Push the pieces through the blade and cut out notches on the ends. Fit the splines right into the notch so they stick.
5. 3 Way Miter

The three way miter is built with 1 leg or post and 2 parallel top pieces and 3 frames. The leg has a stub tenon and two mortises to receive floating tenons.
How to form a 3 way miter
The top piece has a respite for the stub tenon and floating, and two mortises for floating tenons.
Glue the mortises and put the frames in place to assemble the top pieces and clamp it up.
The next step is to glue up the floating tenons in the leg or post and glue the post together with the top pieces.
6. Miter with Dowels
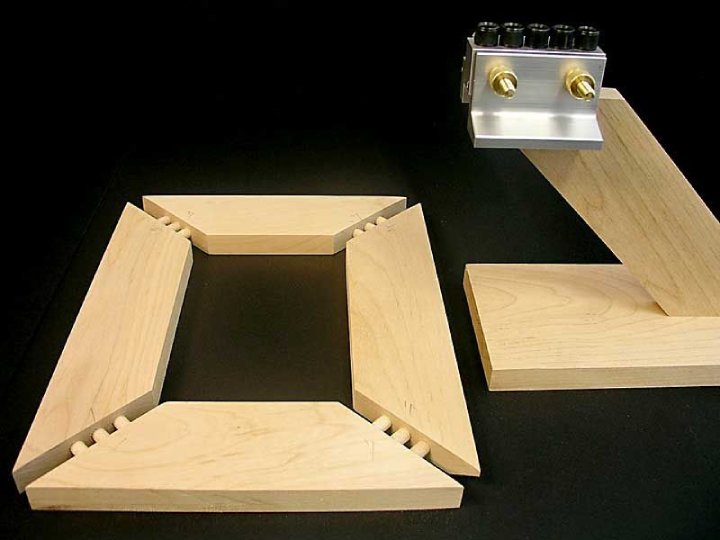
In this type, you simply embed some dowels inside the mitered slope at the ends of all the elements.
How to form a miter with dowels
Make the number of dowels you’ll need for the project using a dowel maker.
Carve out the round grooves with a wood drill bit and set the dowels in to form a tight and sturdy miter joint.
7. Compound miter for crown molding
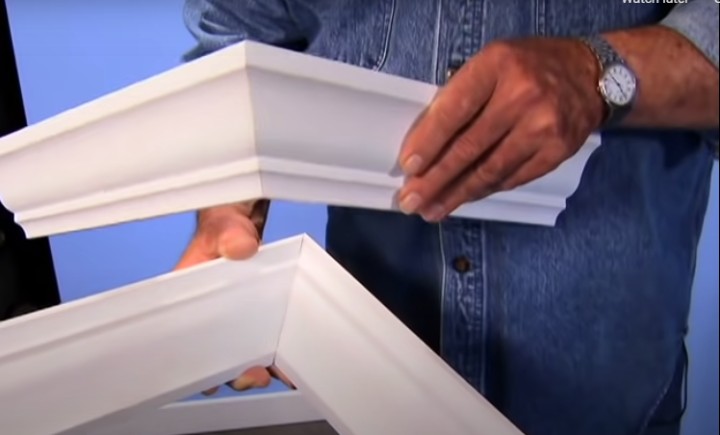
In crown molding, there are two types of miter joints, inside corners and outside corners.
How to form a Compound miter for crown molding
Always place the molding piece on the saw with the bottom edge up, meaning the bottom edge is easier to hold against the miter saw fence.
It’s also important to keep an eye on whether you’re cutting the right hand piece or a left hand piece.
Swing the miter arm to the 45 degrees right to cut a left hand piece and place your material on the right side of the saw blade to get the right amount of bevel.
Swing the miter handle to the 45 degrees left to cut a right hand section of an inside corner and assign the piece of molding to the left side of the saw blade so the bevel is right; and you’ll see both pieces coming together precisely.
Note: Many corners don’t form the exact 90-degree angles so you might have to measure each corner separately and accurately before you make a cut.
Other types of wood joints
- Butt joint
- Half-Lap Joint
- Pocket-hole Joint
- Tongue and Groove Joint
- Dado Joint
- Biscuit Joint
- Mortise and Tenon Joint
- Rabbet Joint
- Dovetail Joint
- Half-Blind Dovetail
- Sliding Dovetail Joint
- Box Joint
- Bridle Joint
- Finger Joints
- Edge Joint
- Splined Joint
- Scarf Joint
- Blind Dado Joint
- Blind Rabbet Joint
- Coped joint
FAQs
1. What are the strongest wood joints?
Ans: Mortise and tenon, dovetail, three way miter, and finger joints are some of the strongest wood joints known to this day.
2. Where is a dovetail joint used?
Ans: Carpentry, furniture construction, cabinets, log makings are fields the dovetail joints are used in.
3. Which type of wood joint is the oldest and strongest wood joint?
Ans: The beginning of the mortise and tenon joint dates back to 4000 years and is known to be one of the most sturdy joints in the woodworking arena.
4. What is an unstressed wood joint?
Mortise and tenon is an unstressed wood joint. Once you’ve hammered your tenon tip into a mortise groove well, there’s no remaining need to stress them further.
5. What is a miter joint used for?
A miter joint is mainly used in picture or painting frames as this type of frame needs a 45-degree angle cut to connect the ends and form a corner.
6. Are miter joints strong?
No, this joint is actually weak as it attaches two end grains of the wood. But it is preferred because of its beautification factor as it hides ugly end grains.


