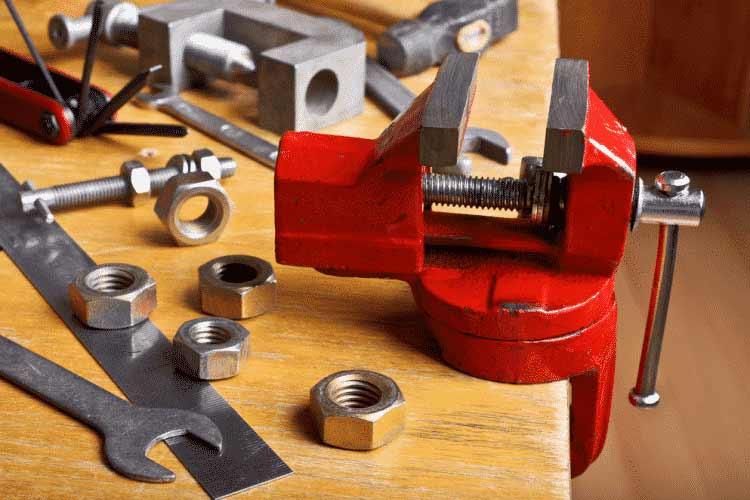
The bench vise is essential for any woodworking or metalworking project. Whether you are a DIYer or a professional contractor, you do need a well-functioning vise. You can employ these tools to clamp any piece of item that you want to drill, shape or cut.
But you need to install it properly to make the most of this tool with smooth and efficient operation. If things go wrong, you’ll end up with substandard output or you could even lose your device due to an accident.
Correctly installing your bench vise demands you take certain precautions e.g. the surface must be flat and firm and the height should have the right adjustment to avoid fatigue and inappropriate body stooping during operation.
Follow our guide and do your installation right so you enjoy top-notch precious and hassle-free operation for many years to come.
Installing a Bench Vise: Without the Holes
To install a bench vise, you need several things. Due to the nature of the workbench vises are designed to do, you require a firm and stable surface. You need to evaluate the size and strength of the platform. The support base or the stands for the platform should also be strong to hold the surface in position.
Making a Mounting Plate
You must hence learn how to install a bench vise well. Below are the steps for undertaking this process.
Step 1
Use a thick and firm piece of timber for this purpose. Consider a thickness that is both stable and strong to withstand cutting and shaping. Any plank that is about a three-quarter inch is just fine. But remember to score the alignment to prevent the grains from chipping while cutting.
Step 2
Depending on the size of your table support frame, cut the plank into two equal pieces. Align the two one on top of the other.
Step 3
You can then apply the glue on one side of each piece. Once the glue is dry, join the two sides smeared with the adhesive. Bond them tightly to stick together. This merger block will now have a thickness of 1.5-inch.
Choosing the Blade, Vise, and Its Location
Choose the right type of bench vise for your specific job and then be smart to pick up the right location. You can establish the location of the bench vise on the table. Use a flat-top rip blade of the saw to make the exact vise position on the table. A measuring tape helps you to determine the ideal location of installing a bench vise. Even though other places will do just fine, a central location offers better convenience.
Creating Dados and Laying out Holes
The next process is to cut dados that will support the bench vise. Cut it to split the first block and enter the second one. However, make sure it only reaches half of the second layer. Use your bench vise to trace the mounting bolt outline on the bottom of the top plate.
Determining the Length Once the L-Shaped Support Shows Up
To determine the length of your L-shaped support, try to use the bench vise screws as well as the thickness.
You can drill wide holes below the planks. These openings should ideally accommodate the size of the screws you want to use for mounting. The thickness should allow the screw to fasten well but not penetrate to the other side of the bottom plant.
Attaching the Vise Properly
You now need to clamp the vise into the two banded timber. Use two wrenches for this purpose. Carefully fasten the screws after installing their washers. The dimension for this is dependent on the size of the vise as well as the thickness of the bolt. You should abide by the safety rules when attaching the vise.
How to Work with a Vise with an Internal Dog?
Since many vises have internal dogs as essential parts, you need to know how to handle them. Hence, you should include a series of dog holes on your bench top.
To make a perfect clamp, you should drill them perpendicular to the benchtop. You can then bore the center of the new holes before gluing the wood to the hooked harness against the edge.
To ensure a perfect fit, you should align the hole to the dog by inscribing a center line on the rear face of the block. You can then use a square to outline preferred hole positions on the bench.
Once finished, drill the required holes aligned to the jig’s centerline. You will use these holes to fix the vice.
How to Work with a Flush-Mount Vise?
For enhanced versatility, you need to flush-mount the tool. This setup makes it sturdier too. However, it required more work. Here are the steps on how to install a woodworking bench vise.
- Lay the notch on the bench slightly longer than the width of the jaws
- Ensure that the depth of the groove is longer than the thickness of the rear jaw by 34-inch
- Make a cross cut at the edge of the benchtop
- Cut a length of the notch after clamping a straightedge to the bench
- Rip the notch to intersect with the crosscut
- Drill the counterbores in the space blocks with your drill press machine
- Fasten screws on the holes drilled on the spacer blocks
- Glue the U-shaped cheek filler
- Trim any excess cheek assembly to align with the width of the table saw
- Attach the rear cheeks of the countersunk holes in the jaw
Essential Safety Tips
When you are installing a bench vise, your safety is of paramount importance. Keep these factors in mind:
- Cover your face and eyes with goggles
- Always use a securely fixed worktop
- Make sure that your stationary jaw is above the worktop surface
- Don’t use oversize pieces for your vice
- Confirm that the clamps are secure and tight
- Make sure that the worktop is flat and strong
Conclusion
You now know that there are several methods of installing a bench vise. You can easily get the job done without grooving any holes. You could have your bench vise installed with dog holes using the right implements and measures. There is also the opportunity to flush-mount it.
During the installation, keep your safety in the mind. You could enjoy many years of stress-free performance when the settings are accurate. On the other hand, you could be rushed into an emergency room with serious injuries caused by improper fixing.


