We see bolts and nuts in almost any mechanical and electrical appliance/unit. But, do we know what it takes for those small things to be in place? Maybe, you have heard about taps and dies. Do you know how to use tap and die set? It’s a lot of fun to be able to use them as they are both tools meant to create threads for screws and bolts and perform many other tasks. The tap forms the female internal threads in a hole, and the process is called taping.
A die looks like a specialized nut and is used to make threads on the male part that is on the cylinder in a process called threading. The two can sound confusing or the same since they all do the same thing, making threads.
If you are looking forward connecting pieces of woods with screws and bolts, then understanding the tap and die set will come in handy. It will help too if the bolts and screws are damaged. Read till the end if you want to learn more about the procedures and how to use the best tap and die set as intended.
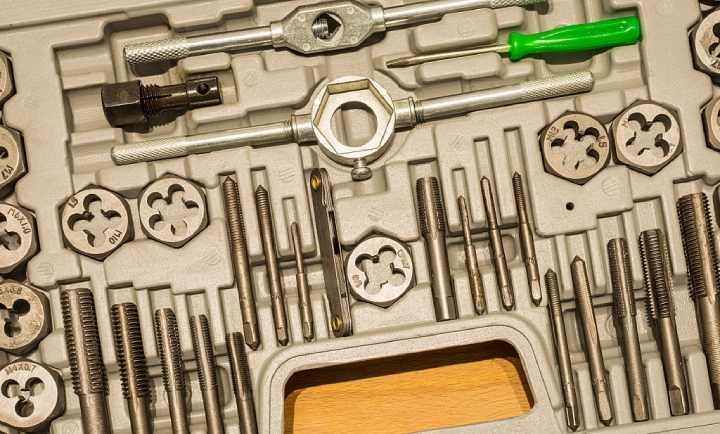
What Is a Tap and Die Set?
Way down in history, nuts and bolts were applied in watermills, flour mills, and many more. Instead of using metals for bolts and screws, wood was used. The goal was to balance loads, but as they became heavier, they led to breakage leading an upgrade to metal.
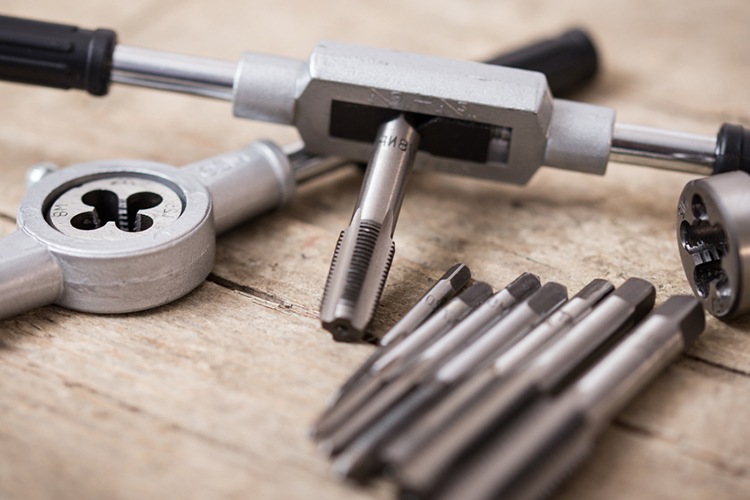
A tap forms the female part that acts as a nut by cutting threads inside a hole. There are over five different types of taps, but only three are commonly used: bottoming tap, intermediate tap and taper tap. The other two are power and forming taps.
The bottoming tap has threads of 1 and 1.5. It allows you to make a thread in a blind hole. Intermediate or plug tap has 3 to 5 threads. Its purpose is to help start a thread in an untapped hole. Lastly, taper tap is smaller, and its threads range from 8 to 10. It is used in material that is difficult to be tapped or in smaller diameters.
A die creates male threads on a cylindrical material. They are found in two types: adjustable and solid. An adjustable die is easier to use since you can gladly expand or compress to different threads. The solid die is unchangeable meaning that they come in an accurate depth. Over the years, these tools sets have come with significant improvements.
How to Use Tap and Die Set the Right Way?
So, how do you use a tap and die set? As simple as it sounds, using this set requires skills. You need to understand and follow specific steps of the set individually as each tool is handled differently.
How to Use a Tap?
You know that a tap is meant to create the female side, but what is the appropriate way of using it? Well, below are some of the steps to use a tap.
1. Determining the Thread Size and Depth: What diameter is best for the whole? First things first, it’s essential that you have your measurements right as different screws require different diameters.
2. Finding the Exact Hole Size Measurements: Refer to a tap size chart to get the hole size measurements. The proper diameter of a hole is called a tap drill size. It is the tap’s diameter deducted from the thread pitch.
TD = MD – pitch
3. Drilling the Hole Maintaining the Correct Depth and Diameter: Since threads cannot go all the way to the blind hole bottom, make sure that the hole is deeper than the depth required for the thread.
4. Securing the Wood Properly: Once your measurements are right, it’s time to secure the wood. Insert the tool in the hole and then turn it around then back to avoid any damage to the thread.
5. Applying the Right Lubricant: Select the proper lubricant then apply on the tap. Avoid brushing the oil on the tap as it does not cover some parts. Instead, force the lubrication into the hole to achieve the maximum effect.
6. Working with the Tap Handle: Some tap sets come with a handle or a rod. If so, insert the tap in the handle then turn it slowly to begin making the threads.
7. Holding and Turning the Tap Clockwise: When going into the hole, try keeping the tap straight to avoid any damages on the threads. Turn the handle twice in the clockwise direction, and you’ll hear the material breaking.
8. Observing the Rotation: After every two clockwise rotations, turn the tap backward. Doing so clears away any loose material.
9. Cleaning the Leftovers: Relieve the tap from the hole then clean out the excess cutting oil and chips. Afterward, you can try fitting the screw or the bolt.
How to Use a Die?
For your how to use tap and die, the die set steps are more straightforward. Here are steps to follow for using the die appropriately.
1. Setting the Die Properly: Set the opening of the die on the screw and turn it to the side of the threads.
2. Cutting the Desired Threads: After setting the die correctly, it is time to cut the threads. Use the die handle and turn the die in a clockwise then anticlockwise manner to cut the threads. This movement will allow the chips to fall off keeping the material clean. You can add lubrication for an added effect.
3. How to Get Rid of Damaged/Unnecessary Bolts and Screws: Note that some bolts and screws get damaged after a long time. It is possible to return them to their usable state using a die. Let us go through steps and learn how to use a tap and die set to retain the material.
4. Gathering Required Supplies
For your materials, you’ll need
- A pen or pencil
- A paper
- A die set
- A torque screwdriver or wrench
- A set of drills
- The right screw and bolt sizes
5. Determining the Bolt and Screw Size: Write down the diameter and length of the bolts and screws to avoid cross-threading or over-tightening. Knowing these sizes will help you figure out the appropriate die size to use.
6. Drilling out the Broken Screw: Use the right drill to reach the screw. Slowly drill the broken or damaged screw out of the hole. Try to be careful when drilling to avoid leaving any broken parts of the screw.
7. Removing It Using the Die: Take out your die set and use the right die tool in the hole created by the drill on the screw. Add lubrication to ease the process if stuck or necessary.
8. Removing the Cross-Threaded Screw: Insert an appropriately sized die in the screw and start cleaning the thread. Remember to use lubrication if needed.
9. Inserting the Right Bolt/Screw: After the cleanup, pick the right size bolt or screw and fix it in the new screw hole. Tighten it a little bit with less pressure.
10. Applying the Right Torque to the Bolt/Screw: Use the torque as your last step to tighten the screw in its clean place.
Safety Measures to Take
Like any other tools, it’s important to stay safe. Follow these tap and die how to use precautions.
- Always wear protective eyewear.
- Make use of cutting oil
- Avoid your skin going into contact with the tap or die as it may result in pinching.
- Be careful when operating the tools to avoid cutting yourself.
- Always read the how to use tap and die set instructions before using them.
By following what we’ve discussed above, how to use tap and die set can no longer be a setback to you. All you have to do is make sure you have the right tool sizes for its ideal purpose. Remember that these tools are sharp and mechanical, so to be on the safer side, take enough precautionary measures.


