A dowel joint or wood peg joint is essential for making furniture or joining wooden pieces together with precision. Most of the time, it won’t be enough to use glue or screws to join different wood pieces. So, you need to follow certain dowel joinery techniques when using the best dowel joint jig to save your time and other equipment while making stronger joints.
In this article, we will talk about different dowel joinery techniques. To be more specific, you will find the following info:
1) What a dowel joint or dowel reinforced butt joint is
2) Making dowel joints with tools & materials
3) End-to-edge and end-to-face dowel joints
4) Dowel joinery tips, advantages & disadvantages
What Is a Dowel Joint?

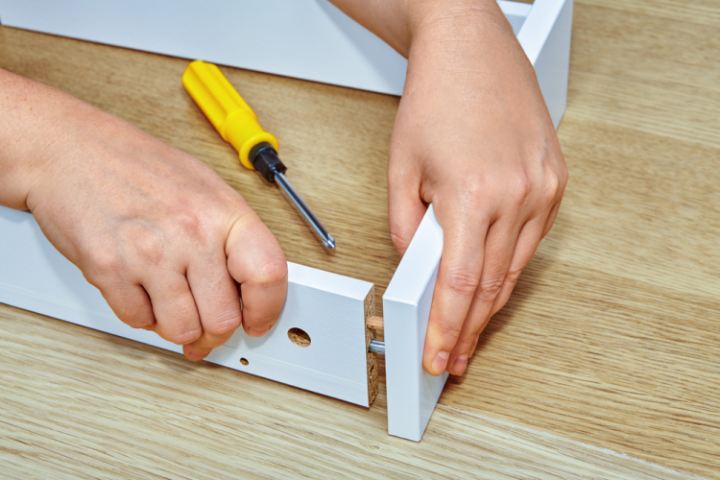
A dowel reinforced butt joint or dowel joint is one of the best ways to attach two pieces of wood. This tool is faster and stronger, and it makes the drilling areas in your project invisible. Moreover, there is a jig to assist you in matching the drilling holes with the joint area.
Just take dowels and glue, bring all the parts together, and tighten the joint with the clamp – that is all about the dowel joinery process.
Advantages
- It helps boost the preciseness of the drilled holes
- This process doesn’t require any screws, nails or other equipment
- Dowel joints provide stronger joint than using multiple rows of dowels
Disadvantages
- Dowels may shear sometimes when you need to drill it out and place another new dowel
- The alignment at first would seem harder for those new to using doweling jigs
How to Make a Dowel Joint?
When you construct a wooden structure, you want the joint in the structure stronger and fastener-free. Dowels keep the joint parts aligned according to your marks. If you plan to build face frames, boxes or miter joints, dowel joints will assist you in building your preferred styles.
1. Required Tools and Materials
- Level, Rubber mallet, Measuring Tape
- Clamps, Drill Machinery, and Bits
- Framing Square, Carpenter Pencil
- Metal Dowel Points
2. End-to-Edge Dowel Joints
If you are into building mitered picture frames or face frames, make sure the log pieces you are working on include flat surfaces, square ends, and edges.
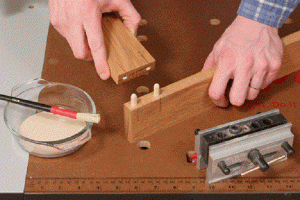
Step 1: Take 3-inch wide dowels, set the log pieces or dowels together, and draw lines. Mark the holes ¼ inches away from the dowel edges
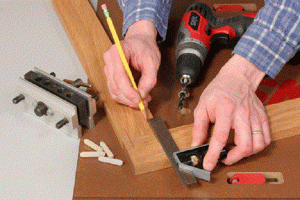
Step 2: Clamp the doweling jig to one of the dowels. Use interchangeable bit sleeves and thread in the suitable sleeve in order to place the bit. Then make use of ¼ inches diameter dowels for ¾ inches thick stock.
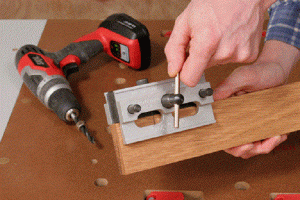
Step 3: Drill the dowel holes in halves of the joint and drill deeper holes to make sure there is a little gap for an extra amount of glue
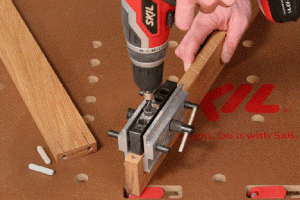
Step 4: Slip the dowels into the holes, ensuring the parts are fit enough. Then pour glue into the holes, place dowels, and apply clamps.
3. End-to-Face Dowel Joints
These dowel joints are applicable mostly for assembling boxes and making cabinet carcasses. You need to have metal dowel points to place these joints properly.
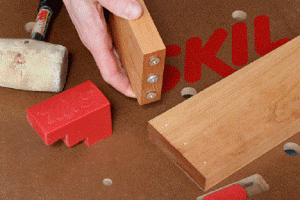
Step 1: Mark the layout lines on dowels where dowel holes will be at the end. Then use a doweling jig to make the holes and later slip dowel points into these boreholes.
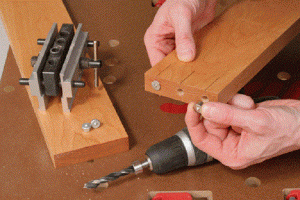
Step 2: Place the joint dowel parts together alongside a clamped fence and tap the end of the dowel point with a rubber mallet
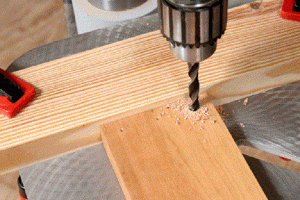
Step 3: Take a sharp bit for drilling and place clamp fence on the drill press table. It ensures the accuracy for the bit’s point to meet the prick holes.
Step 4: Keep on dry fitting the joint. If you see the fittings are much tighter than what you had expected, sand the dowels or widen the holes. If loose, apply a little amount of glue to swell and tighten it up.
Dowel Joint Tips
- Use a top-class drill machine with torque operation
- Using a metal dowel point will ensure proper dowel joint
- Always use a dowel jointer jig to drill appropriate holes
- While drilling holes, at least leave ½ inch of space from the edge of the logs
Finally, it can be said that although making dowel joints is a tricky process, it’s worth the effort than using other equipment for the same purpose. This also helps you build your project with ease. Follow the procedure above to joint dowels with precision.


