Keeping the firewood dry and protected from external agents is essential to get a good fire. Many people use to leave their firewood outdoors, which causes moisture absorption and mold. In order to keep firewood in optimal conditions, it’s essential to store it properly.
A sturdy and spacious firewood rack is all you need to solve that problem. In addition to being functional, firewood racks are decorative and help to beautify the external spaces of your home. Best of all, you can build one for less money than you would spend on a pre-made model.
If you’ve always wanted to have your own firewood rack at home, we have good news for you. Today, we’ll explain you how to build a firewood rack in simple and easy to understand steps. We’ll also include a detailed list with all the tools and materials you’ll need for this project.
How To Build A Firewood Rack With Roof
Tools
- Pencil
- Square set
- Measuring tape
- Ruler
- Clamps
- Circular saw
- Drill
- Kreg jig
- Orbital sander
- Miter saw
- Bubble level
Materials
- 1X6X6-foot Hardwood pickets (16)
- 2X6X8-foot Hardwood boards (4)
- 2X4X8-foot Hardwood boards (10)
- 25-inch Screws for wood
- 3-inch Screws for wood
- 5-inch Screws for wood
- Wood glue
Procedure
1. First of all, start cutting the boards to an appropriate length to use them as posts and base supports. You can use a circular saw to make clean and perfectly straight cuts on each board.
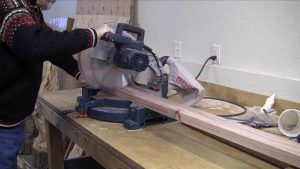
2. After that, start to build the base of the firewood rack. To fasten the boards between each other, use wood glue and 3-inch screws for wood. You can join the boards using a Kreg jig to get a perfect square angle on each corner.
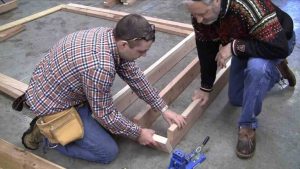
3. Join a 2X6-foot with a 2X4-foot board in “L” position to form the posts. In total you’ll need to build 4 posts for this project. Use 3-inch screws for wood and wood glue to keep the boards in place.
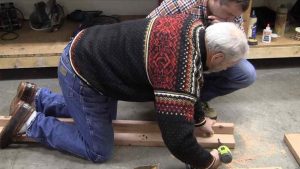
4. Once the base and the posts are finished, install a post in each corner of the base. To do this, use 3-inch screws for wood and wood glue. Also, make sure the 4 posts are perfectly vertical using a bubble level.
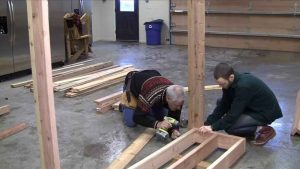
5. Connect the top edge of each post with hardwood beams of 2X6-foot. Make sure the beams are cut at the right length so they can perfectly fit between the posts. If a beam is too long, cut the excess.
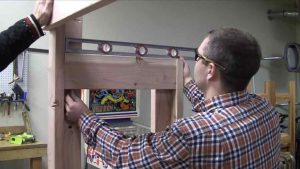
6. Install 4 segments of 2X4-foot board between the front and rear beams. These segments will work as supports for the roof of the firewood rack. Finally use the 1X6-foot pickets to build the covering of the roof. Use 1.25-inch screws for wood to fix the pickets in place.
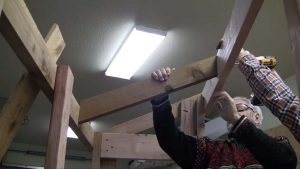
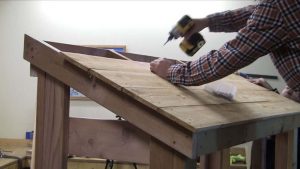
7. After finishing the roof, cover the back and sides of the rack with hardwood pickets. Make sure of only covering the half of each post, starting from the base. Use 1.25-inch screws to fix the pickets in place.
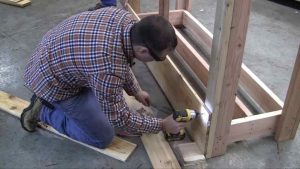
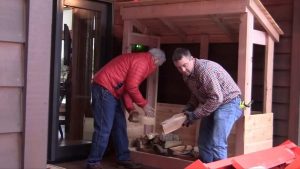
8. Finally, apply a coat of varnish over the entire surface to protect the hardwood from moisture, mold and mildew. After that, you can place your firewood rack on your house porch and begin to stack firewood pieces.
Building a Firewood Rack for Outdoors
Tools
- Shovel
Materials
- Cement
- Sand
- Gravel
- Steel cube molds (2)
- Construction film
Procedure
Concrete is a material resistant to external agents. It keeps its resistance despite extreme weather conditions and direct exposure to UV rays. It is so solid that you need a special type of saw; i.e., a concrete saw to cut through the material.
For that reason, a firewood rack made of concrete is the best choice for outdoors. To build one, you just need to follow these steps:
1. First of all, cover the floor with construction film to prevent concrete from adhering to the surface. Then pour the sand, gravel, and cement onto the covered floor using a shovel.
2. Evenly mix the sand, gravel and cement with the shovel. Then, form a small mountain with the mixture of materials and open a hole in the middle of the mountain. Then, pour enough water into the hole and mix all the materials, preventing the water from escaping.
3. Keep mixing until the mixture has the characteristic color and consistency of concrete.
4. Prepare the steel cube mold and then insert a smaller hollow cube into the mold. Then, pour the concrete mix in the free space between the external and the internal molds. Wait at least 24 hours for the concrete to dry completely.
5. After that, remove the molds and fill the surface imperfections with a mixture of water and cement. Then wait for the mixture to dry. Now you can start stacking firewood pieces inside your new concrete rack.
Conclusion
As you can see, learning to build a firewood rack isn’t as difficult as it sounds. You just need the right tools and materials to get the job done. Choose the more appropriate material for the final location of your new rack. If your rack will be located on your house porch, hardwood is the best choice. But, if your rack will be exposed to extreme weather conditions, high humidity and UV rays, concrete is what you need.
FAQs
Q. 1: Is it necessary to keep firewood covered?
A. Yes. You should keep firewood covered to protect it from rain and other external agents. Humid firewood is very difficult to burn and the fire tends to go out easily.
Q. 2: Which are the best materials for firewood racks?
A. Hardwood, metal and concrete are by far the best materials for firewood racks.
Q. 3: What are the most common places to place a firewood rack?
A. Firewood racks are usually located on the house porch or garage.
Q. 4: Can you stack firewood next to a house?
A. Yes. You can stack firewood next to a house as long as the firewood is properly covered and is located 20-30 feet away from the walls.
Q. 5: What is the best way to stack firewood? Bark up or bark down?
A. The best way to stack firewood is bark up, with the flat face looking down. This way, rainwater will run better on the surface, avoiding excessive accumulation of moisture.
Q. 6: Should you store firewood in your garage?
A. Yes. You can store firewood in the garage as long as it’s completely dried and located 20-30 feet away from the walls.


