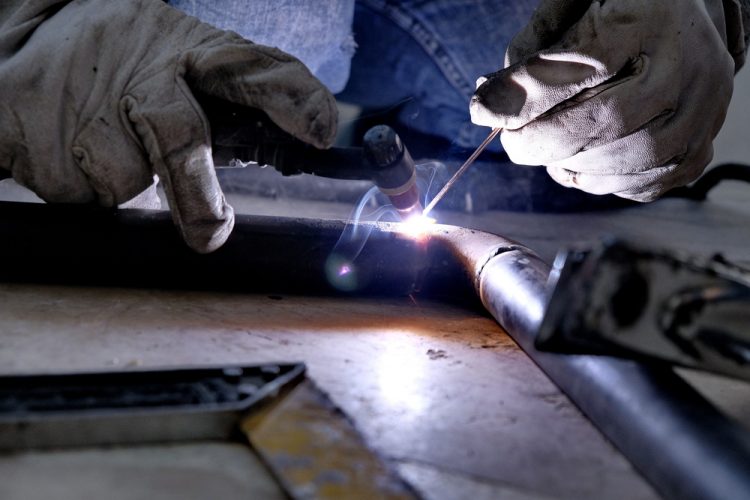
There are a handful of welding methods that blacksmiths and forgers commonly use, including Tig, Mig, Oxyacetylene, and Stick. TIG stands for Tungsten Inert Gas that produces heating through an arc of electrical energy to the steel or metal surface you intend to weld. TIG welding stainless steel settings or metal welding settings consist of different configurations.
Setting up a TIG welder for stainless steel welding is a tricky process that you must know before you buy a TIG welder. Here, we are going to explain the procedure for TIG welding settings for steel and aluminum, or more specifically,
a) Setting up the TIG welding
b) Changing settings, settings for GAS, and maximum amperage
c) Setting up the aluminum welding
d) Changing settings, settings for GAS, AC Frequency, Pulser, and maximum amperage
Stainless Steel Settings for TIG Welding
Every time you transit between from aluminum to steel, you need to change the setup. Follow the TIG welding settings for stainless steel below:
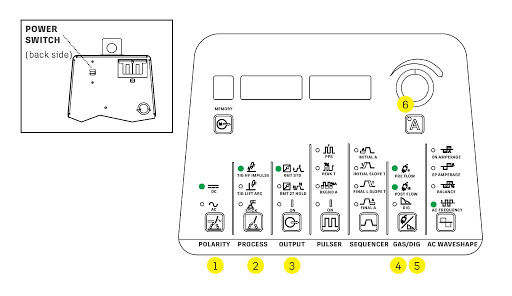
Step 1: Changing Settings
- Turn on the machine and the rear panel
- Tap the bottom row buttons
- An LED green light will ensure you the chosen option
- Some of the options need an amperage knob and result display
- Set the polarity settings to DC
- Later, check the process control and set to TIG HF Impulse
- You need to enable the foot pedal by setting the output option to RMT STD
Step 2: Setting GAS/DIG
- To set this, choose GAS/DIG to Post Flow
- Twirl the amperage knob and select the option Auto
Step 3: Setting Maximum Amperage
- Push the ‘A’ button to turn the amperage knob to maximum
- Use the foot pedal to control the amperage from 0 to maximum numbers
- Per 0.001 material thickness, start with one amperage number. For instance, per 1/8-inch or 0.125-inch material, you should start with 125 amps
Aluminum Settings for TIG Welding
The aluminum settings require you to use pure tungsten or thoriated tungsten with a green, red and yellow band.
Step 1: Changing Settings
- Turn on the machine and the rear panel
- Tap the bottom row buttons
- An LED green light will ensure you have the chosen option
- Some of the options need amperage knob and result display
- Set the polarity settings to AC
- Later, check the process control and set to TIG HF Impulse
- You need to enable the foot pedal by setting the output option to RMT STD
Step 2: Setting Pulser
- At first, set the pulser to PPS
- Twirl the amperage knob and select the pulse number to 4
Step 3: Setting GAS/DIG
- To set this, choose GAS/DIG to Pre Flow
- Twirl the amperage knob and select the option 0.2 seconds
- Again choose GAS/DIG to Post Flow
- Twirl the amperage knob and choose the Auto option
Step 4: Setting AC frequency
- Set AC waveshape option to AC frequency
Step 5: Setting Maximum Amperage
- Push the ‘A’ button turn the amperage knob to maximum
- Use the foot pedal to control the amperage from 0 to maximum numbers
- Per 0.001 material thickness, start with one amperage number, for instance, per 1/8-inch or 0.125-inch material, you should start with 125 amps
To conclude, as part of knowing how to set up a tig welder, you have now surely realized that TIG welding stainless steel settings is a complicated and tricky process; just like using a MIG welder. Gas flow, arc length, and amperage are a few essential factors related to this process. Make sure these parts operate correctly for better output.
FAQs:
1. What should Argon be set at for TIG welding?
Ans. The Aragon pressure for your TIG welding should be between 20 and 30 psi. This depends on the flow rate, which is even more important to manage than the Aragon pressure.
2. What is AC balance in TIG welding?
Ans. Many AC/DC TIG welders feature AC balance that allows you to adjust the arc to different applications. This balance regulates the percentage of positive and negative current within the alternating current for aluminum welding.
3. What causes porosity in TIG?
Ans. Contamination is the main reason for porosity in TIG welds. One of the four things allows for contamination: The shield gas, the rod, the electrode, and the actual metal.
4. Why is my weld bubbling?
Ans. Watch the arc length and voltage to avoid weld bubbling. More gas and air seep into the weld puddle and cause bubbles when the gun is far from the welding site. Bubbles cause weak welds so you want to avoid them.


