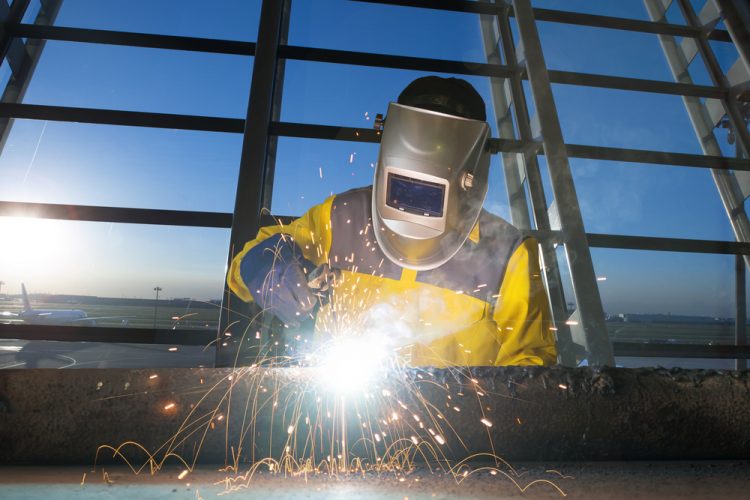
Welding accounts for how two metals are joined by the application of heat, addition of other metals, and in some cases, the use of gases. The Metal Inert Gas and Metal Active Gas methods are commonly used metal arc welding. Gas metal arc welding involves heating two different metals to their melting points so they become one. After that, an active or inert gas is used to militate interactions between the weld, and the atmosphere which enhances the strength and quality of the welding process.
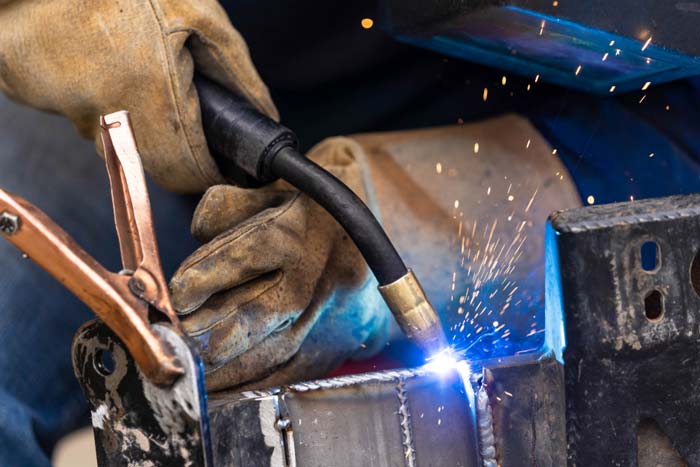
A MIG welder uses the workpiece metal and an MIG wire electrode to cause an electric breakdown of a gas (electric arc). This results in a joining and melting of both metals because the MIG wire electrode causes a supply of an inert or semi-inert gas (shielding gas) that prevents contamination by air.
Effective MIG Welding Techniques
Whatever technique we will discuss here, the fact remains that the right equipment, correct set-up, and clean joints are indispensable for successful MIG welding. The comfort of the operator is compulsory and the set-up must be detailed, having all requirements in place. The joints, on the other hand, must be clean because not much can be achieved with a dirty joint.
It is important to stress that there are two ways to carry out this type of welding. The forehand or push technique requires that the MIG gun be directed towards the weld while the latter requires the MIG gun to be positioned such that the wire is fed in the opposite direction of the metal gas arc. The backhand or drag technique is scarcely used that produces deep and narrow penetrations. The MIG gun is positioned between 5-35 degrees. On the other hand, the forehand technique produces wide and flat penetrations while the backhand technique is preferred for thin metals.
MIG welding patterns are considered necessary to back up your choice of MIG welding technique. These patterns are ways of approach to various metal joints during field work with ease. In these articles we shall consider four basic patterns.
Welding Patterns
1. Whipping Welding Pattern
This method helps the operator to control his travel speed during welding. It runs in successive alternations of forward and back ward welding (twice forward, 1 time backward). This pattern is great for thin metal and making a first pass in a joint.
2. Steady Motion Welding Pattern
The steady motion welding pattern is the basis upon which welding robots are built. It is a simple and basic pattern that requires that your travel speed, electrode angle, and machine set-up are all properly done. When using this pattern, it is important to note that the hotter it is the better the weld.
3. Weaving Welding Pattern
The weaving pattern is suitable when you have a wilder weld and bigger welds that have no distortions. It is good for other welds but for the above cases it is the recommended welding patterns. It can be used either in the vertical up or vertical down position.
4. Circle Welding Pattern
This pattern is as simple as it is named – it requires that you weld in a circular manner. You are required to continuously repeat the circular weld motion until you are done welding. The circular welding pattern runs in successive alternations of weaving and whipping welding patterns. It is suitable for most kinds of joints you would encounter during field work and for thicker materials.
Welding Positions
You should remember that welding positions also affect the success of the welding technique or welding pattern used. We will succinctly discuss welding positions to augment your knowledge of welding techniques, and welding patterns. These trio are to be successfully blended to achieve a successful MIG welding. There are five basic positions you can take during the MIG welding process.
-
Horizontal Position
This position is a little difficult. It works best when you are approaching your welding work from the whipping or circular welding pattern. The MIG gun points upward (35-45 degrees) and permits tilting towards the weld at an angle of 15-35 degrees.
-
Flat Position
This is the easiest position to take with the MIG gun, which is placed such that it points straight down in a leaning manner (up to 35 degrees). This position is for people who choose the steady motion welding pattern.
-
Vertical Up Position
Many have agreed that this position is the most difficult to wield whilst you use the MIG gun. The gun is positioned such that the handle points upward (35-45 degrees). Since the comfort of the welder is the first rule to produce a quality weld work, this position must be adjusted for ease. Building a shelf of weld upward or grinding a small grove at the weld site are good ways to reduce the difficulty attached with this position. This is best when your weld work is wide.
-
Vertical Down Position
This position comes easy; i.e., the MIG gun is positioned in such a way that it can be tilted up at 35-45 degrees. The welding runs from top to bottom. It works well for any welding pattern as long as you stay ahead of the puddle. The puddle is the same as the weld pool. It is the molten filler metal that combines with the parent material during the welding process.
-
Overhead Position
This position is not difficult to hold, but safety measures (e.g. helmets, flameless fabric, cover all parts of your body) must be put in place during the welding process. This is because of the spatters that come with the weld work while taking this position that could cause burns. The MIG gun is positioned toward the weld at a tilting position between 5-35 degrees. A low amperage and voltage would reduce spatter.
Mig Welding Tips & Tricks
No doubt, MIG welding is sophisticated in terms of expertise required and equipment used. Nevertheless, mastering these simple tips and tricks below would help you perform this like a pro!
1. How Well Do You Know Your Equipment?
Inadequate information on the equipment you have or should have is costly in this trade. Before you procure your equipment, make sure you know their specifications and capabilities in detail so you do not underuse or overuse any of them. The manufacturer’s specifications of your wires, shielding gas, voltage, amperage, and more are indispensable if you want to optimally utilize such equipment.
2. Check Your Connections
Check through all your connective points (MIG gun, powerpin, power source) before you start working. The damages that come with loose ends in connection may be costly and regrettable. An additional safety tip to checking your connection is to ensure there are no spatter buildup on your consumables. Spatters restrict the gas flow from the nozzle and these are caused by or dirty workpiece, poor welding, and faulty equipment. Make sure you regularly clean your equipment and keep your ground cable as close to the arc as possible.
3. Use your Safety Gears
Welding processes come with a lot of threats, such as fumes and gases, electric shocks, infrared rays, ultraviolet rays, and more. Wear your helmet, covered shoes, goggles, hand gloves, and other required safety kits. Your clothing should be flame-resistant and void of space to host spatters when they pop. As said before, the operator’s safety is always important to avoid incidents like mutations, physical disabilities (eyes), and burns.
4. Drive Roll and Extension Setting
The specifications (size and type) of the wire determine to a large extent the drive roll selection and tension setting. Your inability to fix these aspects of the MIG welding process would mean a poor wired feeding from the MIG gun. The consequences of poor wire feeding include a poor-quality arc, poor positioning of MIG gun, and wrong liner length. For example, it is a known fact that solid wires and knurled drive rolls don’t make a good welding finish. This is because shavings break off the wire, causing a restriction to efficient wire feeding. In a scenario like the one painted above a U-groove or V-groove drive roll is best. The drive roll tension is set by releasing drive rolls, after which the tension is increased until it is half turn past wire slippage whilst you feed the wire into your hand.
5. Choose the Right Gas for Your Wire
Choosing the right gas for your wire is important to produce a quality arc. Never be deficit on information that guide your choice of appropriate gases for different wires. Below is a list of wires and their required gases. Diameter wise, a 0.030 inch or more has wide application to various thick welding works while a .023 inch is used for thinner materials.
Aluminum Wire: Argon shielding gas is recommended for aluminum wire. It produces stronger welds and eliminates poor wire feeding.
Stainless Steel Wire: Stainless steel is recommended for a tri-mix of argon, CO2, and helium. It produces a quality metal arc.
Carbon Steel Wire (solid): A dual mix of 75% CO2 and 25 percent argon which is recommended for a solid carbon wire. For efficient results use these mixes indoors to avoid any interference of wind.
6. Use the Right Contact Tip Recess
Contact tips transfer the welding current to the wire while the contact tip recess is the position of the contact tip in the nozzle. The contact tip recess used in application accounts for the quality of the welding process, a bad contact tip recess position accounts for: poor penetration, excessive spatter, and more. The fact remains that there is no definite contact tip position to use in several cases because the application determines the contact tip recess. Nevertheless, a guide from the thumbs rule states that “As the current increases, the recess should also increase.”
7. Direction of Your Wire
For quality welding, it is recommended that your wire should stay directed (leading edge) at the welding pool. Poor wire direction accounts for various low-quality weld beads, while a perfect/quality weld bead just has a slight crown on the metal. Sometimes the welding position accounts for the poor quality of weld beads. So, while you weld vertically/horizontally/overhead positions, use small wire diameters and keep your weld pool restricted.
8. Use Your Two Hands and Observe
When you use the MIG gun, it is best to use your two hands whenever possible to enhance your productivity. Also, pay attention to the sound the MIG gun produces because it indicates errors in your set up or mechanical issues. A loud sound indicates low amperage, while a crackling sound indicates a high amperage.
9. General Tips
Keep every consumable out of the reach of moist. They should be cleaned after use and returned back to their safety packs. Using a glove is required to avoid any form of contamination of moist from your hands to the tools. High maintenance of equipment and consumables would enhance quality welding processes, ideally it is the first requirement for efficient welding.
Mistakes to Avoid
Now we will see how to avoid any possible mistakes during the welding process.
-
Overheating
Overheating mostly comes with the consumables used in the welding process. When the stick out is too long or too short or the contact tip is too close to the weld pool, it increases friction and results in overheating. To avoid these mistakes, set it up correctly at the required contact tip- work distance, pay attention to the MIG gun duty cycle, and lastly source for better consumables that are made to reduce/nullify overheating tendencies.
-
Wrong Voltage and Wire Feed Speed
An improper voltage whilst you use the MIG gun would cause overheating and destroy the contact tip. The resultant effect of an improper voltage is an erratic arc, an improper wire feed also accounts for an erratic arc. Neither a fast nor a slow wire feed speed can produce a quality weld work. The only solution to avoiding the mistakes that come with an improper voltage or improper wire feed is to follow the manufacturer’s recommendation for use of such equipment.
-
Wrong Choice of MIG Gun
The choice of your MIG gun is based on the task to be performed, again the importance of checking the capabilities of the MIG gun is indispensable. Work with MIG guns that have the duty cycle and amperage required for the welding task. If this choice can be well made, the chances of overheating during long welding tasks would be greatly reduced. The choice of your shielding gas also affects the heat rate of the gun. Argon causes a lot of heating but gives a clean finish.
-
Wrong Choice of Welding Ground
This error accounts for erratic arc, so the ground on which the welding is carried out must be firm. If it is not a firm surface the quality of the work is affected. Destruction of the contact tip or other consumables used in front and overheating tendencies could also occur. Placing the ground cable close to the workpiece, on the weldment or bench is the best way to avoid these mistakes.
-
Poor Cable Management
Common mistakes like pulling the welding machines with the cable, cooling the MIG gun hanging over something, working with the wrong MIG welder settings, or pulling the cables which can stretch the conduit can reduce the performance of the MIG gun. If consumables are improperly allowed to dry, they can take a wrong shape which would reduce their efficiency. To avoid these errors, it is important to take care of your cables and dry your MIG gun in a flat position. Anything that stresses the cable, which can affect the conduit should be avoided.
To conclude, MIG welding is unique and efficient for quality weld work finish. In spite of its capability to produce quality weld work mistakes, wrong MIG welding patterns, improper MIG techniques can dampen the reputation of this equipment. A good blend of the techniques, patterns, and tips would increase the quality of your welding. General maintenance of the equipment would cut out a lot of performance reducing tendencies that come with using the MIG welder. As a result, knowing your tool according to their specifications and capabilities is important for quality output.


