
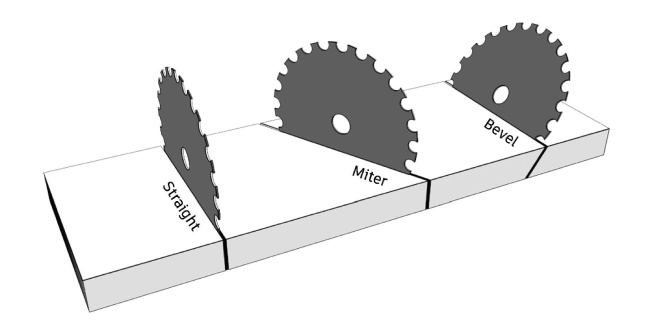
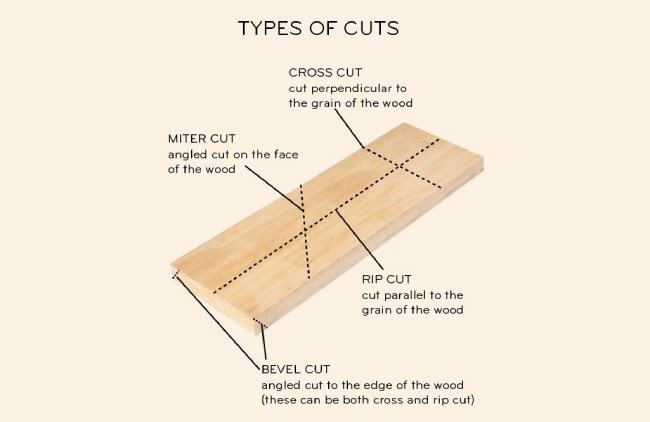
Both miter cuts and bevels cuts are essential parts of wood and metal working. Miter cuts are vertically angled and made across the surface of a material. It has become a standard practice to create frame-like structures.
On the contrary, bevel cuts are also angled cuts, but with a twist. Bevel cuts are usually
Angled horizontally, and are made right across the width of the material. In bevel cuts, the surface won’t be perpendicular to its edges.
Let’s explore the in-depth comparison between miter cuts and bevels cuts so that you can choose the perfect cut for your project. Let’s jump right in.
Miter vs Bevel cut explained
Miter cut
A miter cut means a vertically angled cut made across the surface or width of a workpiece. Any 45° angle cut is considered a miter cut. Of course, you can cut irregular miters such as 30° or 60° angle cuts.
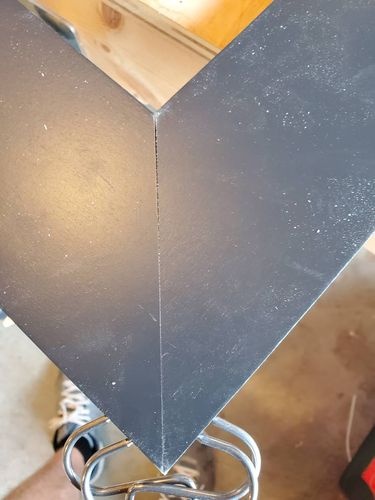
Mostly, miters are cut to make corner joints to form frame-like structures. When two 45° angle pieces are joined together to form a perfect 90° angle corner, it’s called a miter joint. Miters are popular joints because they’re appealing in appearance and easy to create.
You’ll notice these joints in picture frames, windows, doors, and the like. They are often used in molding works as well. Identifying a miter joint is easy as there will be a straight line. Miter joints may look pretty, but they’re not the strongest.
Bevel cut
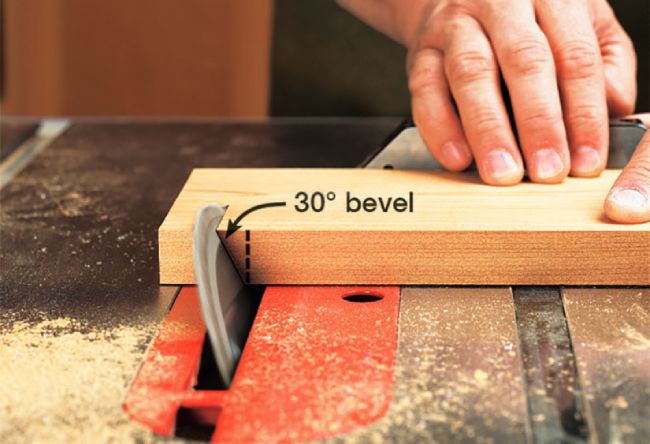
A bevel cut is a horizontally angled cut made right across the width (thickness) of the material where the surface will not be perpendicular to its edges. It’s an edge with an angle that’s not over 90 degrees.
These cuts are usually made with power saws such as a miter saw, circular saw, or table saw. You may as well find beveled angles in, cabinetry, baseboards, mirrors, pieces of furniture, and other decorative items.
An angled edge signifies the bevel cut; they’re typically used to prevent and merge sharp corners like the corner edge of a bench.
How do you tell them apart?
You may not be able to make a distinction between the two immediately without paying a bit of attention first. Take a closer look at where the cut is exactly made on the workpiece.
Miter cuts will be on the face of the two segments to join them together. In contrast, the bevel cut will be right along with the endpoint or edge of the work material.
Miters are cut by pushing the work material against the work table at an angle toward the blade. On the other hand, bevels are cut by changing the angle of the blade itself.
How to Make a Miter Cut?
1. Think of your safety
First and foremost, take proper safety precautions before jumping into action. Wear a mask to prevent sawdust from entering your nostrils and mouth. Always keep your hands at least 6 inches away from the blade.
2. Get your machine and material set
Power up your miter saw, turn it on, and make some rough cuts to test it. Measure the work material and draw a straight line across where you’ll need to make the cuts. Set the material on the saw table and flush it against the fence.
Make the handle on the gauge looser a little, press onto the lock handle, and tilt the saw blade into your desired miter angle, then give an extra turn to the handle on the gauge. Lower the saw blade to check if it’ll cut exactly where you want.
You may adjust the placement of the material if necessary. Take the time to clamp it down so it holds into position firmly and does not jump out of place.
Tip-1: The board must be supported if it extends way beyond the base of the saw. Use wing supports along with the saw stand or go ahead and stack the scrap wood pieces to accommodate the process.
3. Make the cut
Use one hand to cut and move the saw handle and keep another on the board for any adjustment you might need to do later on. Squeeze the trigger and let the motor reach its highest operational speed. Carry the handle carefully and bring the blade down onto the material and continue with the saw to pass it through the board. Go easy on your saw.
Let the blade do the work and don’t put any unnecessary downward pressure. Release the trigger once the cut has been made. Do not raise the handle unless the blade has stopped rotating completely.
Tip-2: If your project requires several cuts of the same size and length, you may want to use a stop block; securing it to the saw fence using tapes that stick from both sides. Then place the endpoints of the boards against the block to get every subsequent piece at about the same length. This will ensure a gentle operation and save you time.
How to Make a Bevel Cut?
1. Get the right saw and place your boards
You’ll need a special type of saw that can actually tilt to the sides to execute a bevel cut. Go ahead and use a standard miter saw or a compound miter saw, place the pre-marked boards on their edges tight against the fence. Place the boards facing up or flat on the base when using a compound miter saw
2. Make the adjustments
Set the meter at the front side of the saw to get the amount of angle you want. Tilt the saw handle on the side so the blade comes at the board from the angle horizontally. Make sure the blade reaches the board right where you need the cut.
Clamp the board down so you can put more focus on getting the cut right and not on the movement of the board as you drive the blade. The bevel gauge should be at the rear section in case you’re with the compound miter saw.
3. Make the cut
Pull the trigger from above and lower the handle to get the saw blade into the work board to execute the cut.
Uses of miter and bevel cuts
Miter cut applications
- Box making
- Picture frames
- Windows and doors
- Seals
Bevel cut applications
- To smooth out sharp corner edges
- Joining pieces
- Weather-resistant applications
- Geometrical figures
- Wall base trim
FAQs:
1. Is a bevel cut the same as a miter cut?
Ans: No, they’re both angled cuts but very different. A miter is like a cross-cut at a 45° angle on a piece of board. But the bevel is a cut with the saw blade tilted over from a horizontal angle.
2. Do all miter saws make bevel cuts?
Ans: Yes, both single-bevel standard miter saw and double-bevel compound miter saw variants can make bevel cuts along with their signature miter cuts.
3. Can you cut a 4×4 with a miter saw?
Ans: Yes, you can! In fact, you can even cut bevels or miters out of a 4×4 with a miter saw.
4. Which is correct mitre or miter?
Ans: You say the word the same way. But when it comes to the question of “which one is more accurate, “miter” is the correct way to the Americans and “mitre” would seem more appropriate to the British mates.


