As the name of this irreplaceable woodworking tool implies, a biscuit joiner is used to join wood pieces. In this guide, we will show you how to use biscuit joiner. Hundreds of thousands of woodworkers around the world choose the biscuit joiner for their projects. Why?
First of all, a biscuit joiner has many advantages. Simply put, if you want to make the joints very quickly, in a simple way, effortlessly, and you need durable and strong joints, a biscuit joiner is a right choice. It is good both for light and medium demanding joints (when it comes to its load-bearing capacity). Furthermore, biscuit joinery is the perfect alternative to the Tenon joinery and mortises.
It is the versatility of the biscuit joiner and the opportunity of making perfectly aligned joints that prompts every woodworker to learn how to use it properly. Skillful and efficient use will lead to very quick completion of your work and impeccable, seamless joints. Therefore, go through the steps of using a biscuit joiner guide straight away!
Understanding the Biscuit Joiner Basics
Using biscuit joiner is marked as simple by professional woodworkers. You will not have trouble mastering the skill of using it. Understanding the basics will help you use it more efficiently.
Key Segments in the Biscuit Joining Process
Simply put, we can compare the principle of the biscuit joiner with regular wood dowels. Learning how to use a biscuit jointer depends on the three key components of this process.
- The biscuit joiner
- The biscuits
- The glue
The biscuit joiner has a blade for making the slots. The blade must be adjustable. This is important for different wood thicknesses. Furthermore, its adjustability is crucial for the cut depth. This is where we come to the second shackle of the chain – the biscuits.
There are different biscuit sizes. Usually, woodworkers use several standard sizes. They are denoted as a 0-biscuit, a 10, and a 20-biscuit. Type of the required joint dictates the biscuit type. It is important to emphasize that the biscuit surface is scored. Now, we come to the glue.
The biscuit glue is special because it has a dual role. It not only keeps the biscuits and the wood together, but it slightly expands the biscuits. As a result, the joints are extra-tight. As we have already mentioned, the scored surface reinforces the adhesion of the glue to the biscuits.
Areas of Application of a Biscuit Joiner
The first thing you need to know before starting your work with a biscuit joiner is when to use it. This is choice #1 if you want to make quick joints. In addition, if you opt for simplicity, take your biscuit joiner and make some amazingly tight joints! Popular areas of application include:
- Carcass miter constructions
- Edge banding
- Shelves
- Drawers
- Face frames
- Shelf-carcass attachments
- Face frame-carcass attachments
How to Use a Biscuit Joiner? – 12 Steps

You need to follow these steps once you’re done making your biscuit joints and preparing to put your device into operation.
- Placing wood pieces
- Marking the wood
- Setting the cut depth
- Placing the joiner on the marks
- Cutting, gluing, slipping, and clamping the wood
- Cleaning the wood and the joiner
1. Placing Your Pieces of Wood
It is a good idea to number the pieces of wood before placing them, especially if you have many pieces that look alike. For example, if you are making a face frame. Number them and place them one next to the other, with grains facing the same way.
2. Marking the Spots for the Placement of the Biscuits
Mark the spots where you will place each biscuit with a pencil. The more the biscuits, the stronger the joint. However, don’t exaggerate, as you don’t want to make too many cuts in the wood. The optimum distance between the two biscuits is 6 inches.
3. Doing the Same for Another Piece of Wood
Your experience and the 6-inch rule will help you determine the perfect number of biscuits. Make sure that all pieces of wood are secured. You can use as many biscuits as needed until the required wood joint stability is reached. You should care for the furniture to preserve these joints in the future.
4. Setting the Depth of the Cuts
The slot should be 1/32-inch deeper than the half of your biscuit dimension. This is important for obtaining a strong joint and providing the “wiggle” space for glue and adjustments. You should carefully set this depth, as a shallow slot will not allow the insertion of the biscuits, while a too deep slot will result in a poor joint.
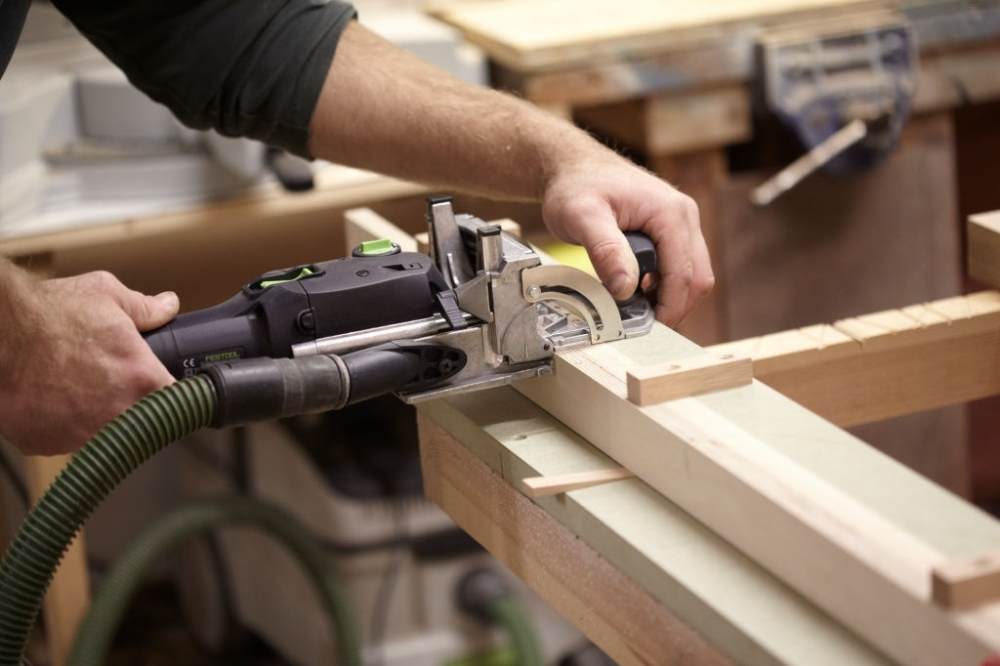
5. Placing Your Joiner Firmly on the Marks
Make sure that the joiner is perfectly aligned with the wood piece. Use your strength to place it as firmly as possible against the wood. Pay special attention to accuracy. You must place it exactly on the marks you had made previously.
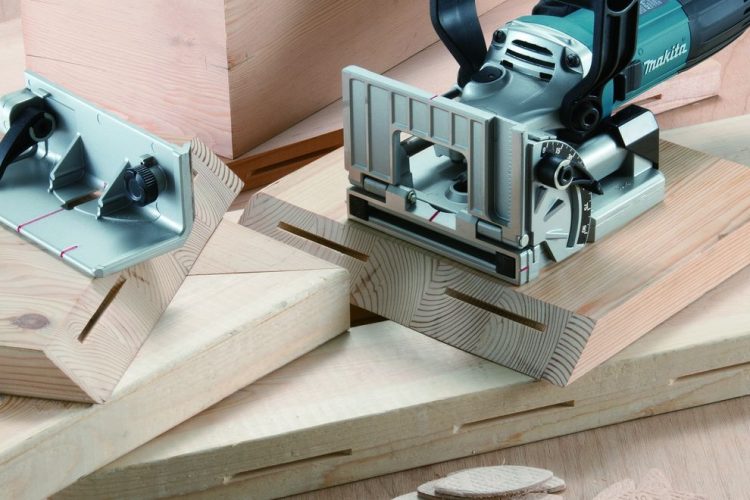
6. Making a Crescent Shape into Your Wood
Turn the joiner on and cut a crescent shape in the wood. Applying the pressure will activate the blade. You will notice that the crescent slots are slightly larger than the biscuit. This allows you to accommodate it before the gluing process.
7. Cutting Slots Wherever Is Required on the Woods
Each position you marked as a biscuit slot must have a crescent-shaped slot. It is important to center the cuts, as they will already be slightly larger than the biscuits. You don’t want to have too much adjustment space, as glue can’t fix such a mistake.
8. Covering Each Biscuit and Gluing
You should use a generous amount of glue as the wood will absorb a portion of it. There are specialty precision glue bottles available in the market that will prevent a mess. Otherwise, you can use a brush. Don’t forget to cover the sides of the biscuits with glue as well. Then, quickly make the adjustments as the glue will dry.
9. Slipping a Biscuit Properly
This is a very important part of the job. You have to be quick and precise. This is the turning point of your project, as the glue will dry very quickly. As soon as you make all adjustments, slip the biscuits into the slots.
10. Clamping the Wood Pieces with the Clamps
Clamping wood is important as the biscuits which are compressed will expand. In this way, the slot will be completely filled. This will further reinforce the action of the glue and strengthen the connection between the pieces of wood. The bond will become even stronger with time.
11. Getting Rid of the Glue Leftover (Before It Dries)
Regardless of the method you use, special tubes, glue bottles, or brushes, you will inevitably make some mess. It is important to immediately get rid of the excess glue. Remember, it will dry quickly and you will not be able to clean it once it dries.
12. Cleaning the Joiner
Similarly, you should clean the joiner immediately after your project is finished. Don’t allow any glue or wood particles stay on the machine. Always follow the instructions by the manufacturer to prolong the lifetime of your biscuit joiner and ensure its maximum performance.
Safety/Warnings to Use Biscuit Joiner
Safety while using the biscuit joiner is very important. Here are some safety measures you should not neglect if you want to learn how to use biscuit joiner.
- Always wear safety glasses
- Always wear a dust mask
- Wear tight sleeves or sleeveless clothes
- Keep the blade sharp as it may cause joiner displacement and injury
- If you notice smoke or unusual smell, replace the blade
The greatest benefit of knowing how to use biscuit joiner is being able to make perfect miter joints, edge-to-edge joints, butt, T, and corner joints. You can make various pieces of furniture and other wood products effortlessly, efficiently, and quickly.
On the contrary, if you don’t use your biscuit joiner properly, the chances that you will ruin the project are high. In addition, you may end up hurt. Therefore, we highly recommend reading this guide carefully. In this way, you can take pride in the new skill you have just acquired!


