Protective items for cutting wood slices
- Helmet
- Safety goggles
- Hearing protection
- Chainsaw chaps and jeans
- Long sleeve shirt
- Cut-resistant boots and gloves
How to Cut Wood Slices for Centerpieces
Method 1: Cut with a jig
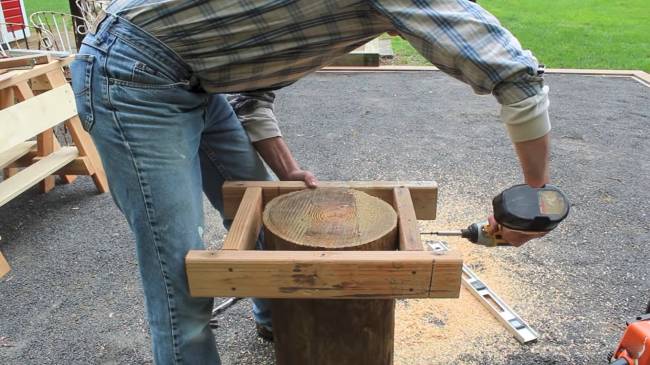
Step 1: Build the Jig
a) Slice the log of a tree after measuring the diameter. Cut two pieces of a 2 x 4 that are the same length from that measurement.
Now measure two more 2 x 4s that are at least 4 inches longer. This will allow you to form a box with some extra room.
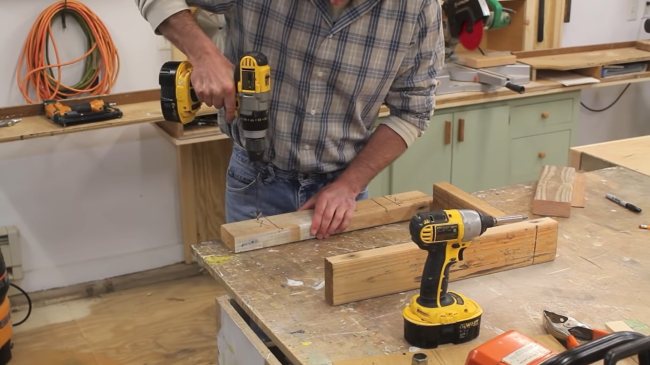
b) At this point, you’ll nail these pieces of 2 x 4 together to make a box. You’ll then slide the box over the trunk of the tree.
You should nail one of the ends of the first 2×4 you cut to the edge of one of the second 2×4. The longer board is where you should start.
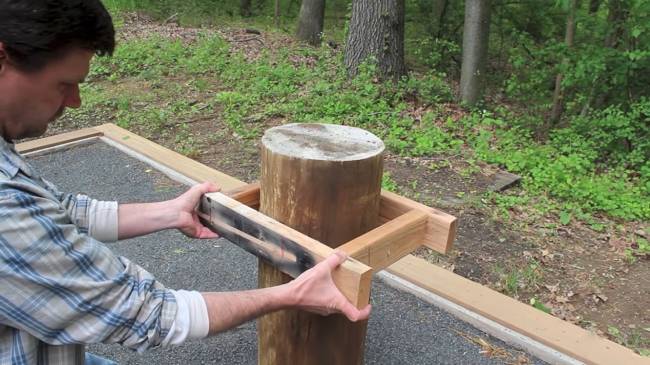
c) After nailing together the right angle, place it against the trunk and mark the spot where the 2 x 4 shorter piece should be nailed. Now, nail the shorter piece into the longer one. Your box should now look like a U-shape.
The last piece of 2×4 lumber must be nailed to the box’s two tips. The 2 x 4 box is now formed.
Step 2: Set up the chainsaw blade
Choose two thin scraps of wood that are the same size and at least 1 inch thick.
One of the wood pieces should be glued to the chainsaw blade’s right side. Glue the other near the tip on the same side.
The chainsaw chain will be raised above the jig so that the blade can slide across it smoothly for a perfect cut without touching the jig.

Step 3: Fix the Jig to the Log
As you slide the jig along with the log, make sure you adjust it so the jig top provides clearance for your desired thickness of the cut.
To accommodate the chainsaw blade’s raised level, slide the jig down another inch.
Through screws in the jig’s two opposing sides, fasten it to the log. This will prevent it from moving while you are cutting.
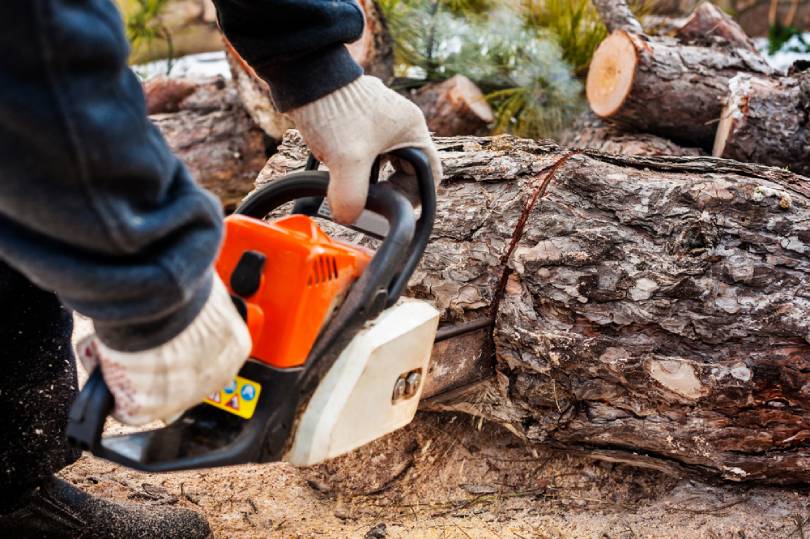
Step 4: Begin the sawing process
Start the chainsaw and grasp it firmly with both hands.
As you slide the blade across, press down on the throttle and slide it along the right side. Cutting will be leveled by the wood strips attached.
When pushing through the cut, apply light pressure. Chainsaws should handle the bulk of the cutting. If you have to push the blade hard in order to cut what you want, you probably have a dull chain. You’ll need to sharpen it before you continue.
Step 5: Finish Cutting then Repeat
Finish cutting the wood and let it fall to the ground.
Slices of wood can be cut again by repeating the cutting process.
Method 2: Leveling and cutting
The process is straightforward where measurements are eyeballed and the log is cut without any markings. To get the wooden slices down to an acceptable level, you must use a sander after you have cut them.
You should still follow the first method’s Steps 1 and 2 in order to follow the safety precautions. Make sure you have a good grasp on your chainsaw before you turn it on, and don’t press too hard while you are cutting.
Make sure your chainsaw blades are sharp. Keeping your tools sharp will help you complete tasks more quickly.
Method 3: Freehand
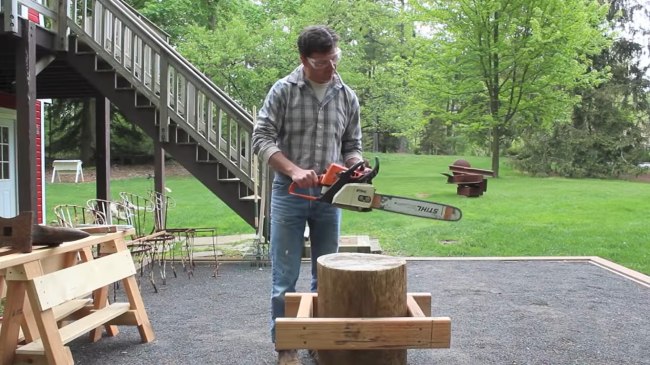
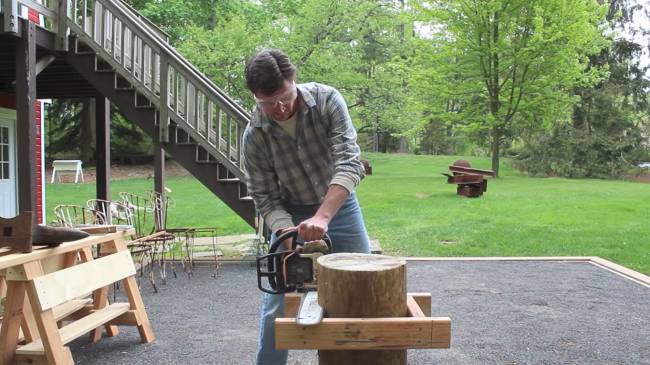
Step 1: Stand the log against a wall
Slices of wood should never be cut from a ground-level log. If the chainsaw hits the ground, the blades are likely to dull, or you may suffer from kickback. Place the log just above knee height.
To do this, prop it up at least 15 cm off of the ground. Chainsaw horses, sawbucks, or any other sturdy wooden object can be used to hold up the log.
Step 2: Look for tree knots
The chainsaw chain can be damaged if you cut through these tree knots before you start to saw. You are at risk of experiencing kickback if you use them.
As soon as you locate the tree knots, you can figure out how to steer clear of them. For some, you can probably just snap it off with a chainsaw so that you don’t have to keep looking for it all the time.
Step 3: After measuring, mark the log
This is where you mark the exact thickness of your log that you want. The typical thickness is between 1 and 5 inches. If you want to get an accurate thickness measurement, you will need measuring tape.
In the case of dark wood, you can use masking tape or chalk to mark the log. A marker may be sufficient in the case of lighter bark. To obtain the best accuracy, trace the tree’s entire circumference.
Step 4: Start sawing with your chainsaw
Make sure you have a good grip on the chainsaw before you turn it on. Keep it about four to five inches above the marks you created and lower it slowly to begin cutting. Be careful not to push too hard.
Most of the work will be done by the chainsaw and it may need to be resharpened if the blade isn’t cutting well.
Step 5: complete that slice then start again
Mark the next area of the trunk after you have sawed that first slice, and do the same for the next section. The chainsaw can be allowed to cut the first slice before dropping it, or it can be stopped after cutting the first slice and then repeat that process again.
How to Prevent Wood Slices From Splitting?
Tools you need
- brush
- end sealer
- spacers
- burlap or shade cloth
- moisture level reader
1. Avoid direct sunlight when drying your wood
The exterior of a slab of wood will dry much more quickly than its interior, which could result in it splitting. When drying outdoors, make sure it is covered so it does not get wet.
2. Seal the slab ends by brushing the end sealer on them
Cut ends dry faster, which can cause warping and cracking. Using your brush apply a thin coat of end sealer on the slab ends. The slab’s top and long edges should not be sealed, because the wood will still dry out to an acceptable moisture content.
3. Stack the bits with spacers to maximize airflow
You can use scrap wood that is 3 to 4 inches thick so they are 18 to 24 inches apart. The pieces can be laid flat over the scraps of wood. If you have additional pieces you’re drying, set them in line with the scrap wood by putting 1-inch spacers between each slab.
4. Burlap or shade cloth can be used to cover the wood
Make sure the wood is covered in a fabric that allows air to flow through it, either burlap or shade cloth. Furthermore, it will retain heat, so the exterior and interior wood will dry at the same time. Make sure to leave the cloth on while drying.
5. For every inch of thickness, let the wood dry for one year
If it is moldy or rotted, inspect it every few days, and kill bacteria by spraying it with a cleaning solution, if needed. No matter how dry the slab appears on the outside, the inside might still be too moist. In order to measure moisture content, press your moisture meter into the wood and take the reading.
FAQs
1. Can wood slices be made food-safe?
Ans. On the wood slice, spread some mineral oil and apply it with a cloth. The oil will soak into the wood at first. You will need three to four coats the first time. Each coat should be allowed to dry for about half an hour.


