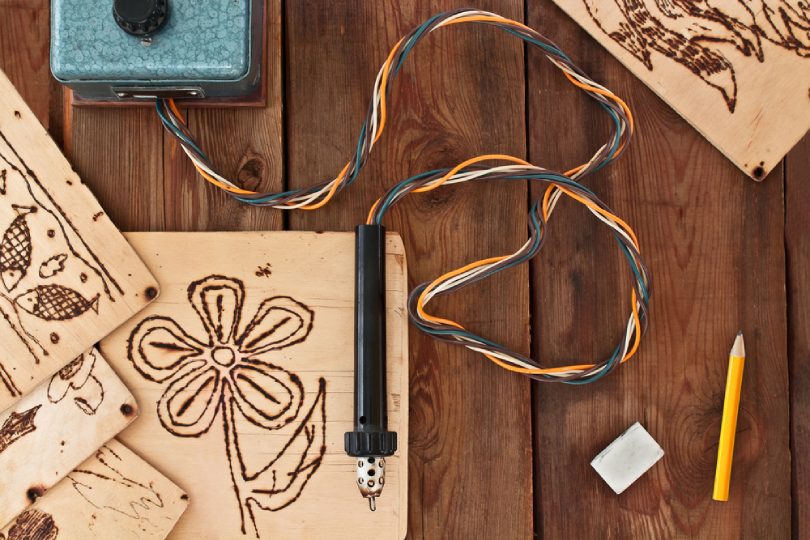
Pyrography is all about enhancing the beauty of the wood. This art has been around for centuries and is still practiced by many people all around the globe. From the earlier days of mankind, this art was practiced by African tribes and Egyptians with perfection. Popularly known as wood burning, this is a fantastic art to master. This is because it not only showcases the creativity of your mind but also can be a source of income. Knowing the essential methods for Pyrography Tools can be an invaluable skill to master. This is because it is an art that is slowly dying. People have become so busy nowadays that they often do not focus on these arts. By learning pyrography, you can save this art from extinction and can show your talent to the whole world.
Sometimes it’s all about the subtle effects and colors that matter. Pyrography has enabled us to achieve awe-inspiring colors and textures that remain permanently on the wood. Due to the wide range of possibilities of this art, it has earned a special spot
Age, gender or social class doesn’t influence the ability to master this fine art. Any person can master the art of pyrography if he/she practices it regularly. What really matters is the dedication and willingness for working hard. With proper dedication and hard work, anyone can be a great pyrography artist.
Pyrography Tools – A Complete Guide to the Art of Wood Burning
Pyrography Tools a relatively simple art which requires very few tools. With some basic pyrography tools, you can also make yourself a great artistic work. These are the tools that you’ll need:
- Pyrography pens
- Carbon Paper
- Tape
- Sandpaper or Sanding sponge
- Moist paper towel
Pyrography Pens
There are special pen-like structures that can be used to burn the wood. These are highly sophisticated equipment which you can use for your artwork. The pyrography pens are mainly of three types:
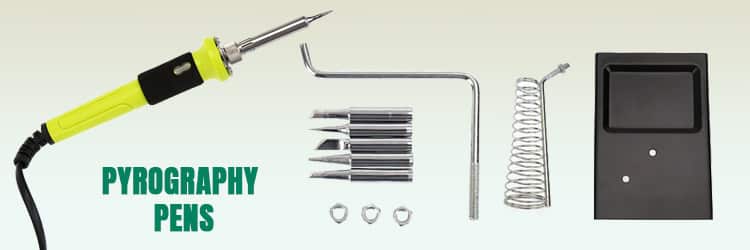
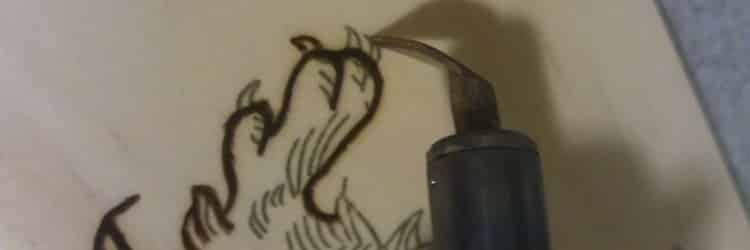
Solid Point Burners
These are pen-like structures similar to the ones used for soldering irons. It is the most used pyrography pen and is still one of the favorites to most pyrographers. It runs on electricity and generates heat from a heating pad. Although very convenient, it is not ideal for detailed art.
Laser Cutters
These are automated pyrography pens which don’t require manual work. You can easily upload the picture or design you want to print on the wood, and these laser cutters will easily print it for you. These are great for accuracy and detail but are costly. And surely, these are not ideal if you want to actually learn the art of pyrography!
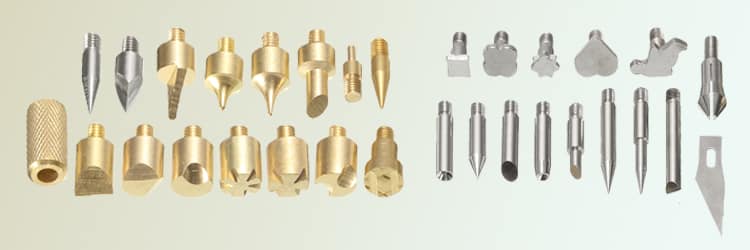
Wire Nib Burners
The wire nib burners are one of the most versatile pyrography pens that you may find. These come with a pen and interchangeable nibs for different styling and designs. These feature smart temperature control which enables you to get the perfect texture of burning. It is considered to be the best pyrography pen for perfect detailing.
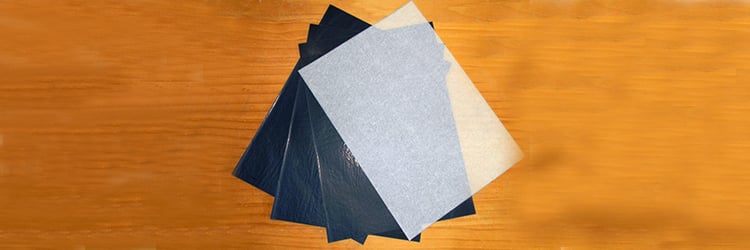
Carbon Paper
This is mainly required to trace out the design onto the wooden surface. You can precisely draw each nook and cranny without even worrying to have mistaken
Tape
It is required for sticking the carbon paper onto the wood. It prevents the carbon paper from moving so that you can precisely draw the design onto the wood.
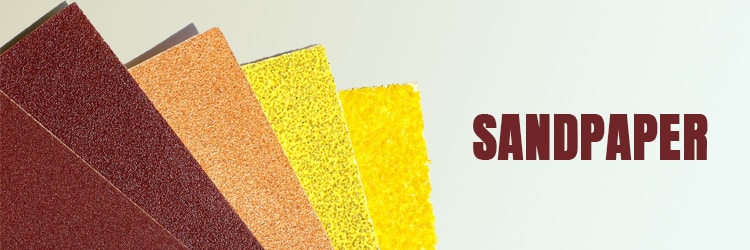
Sandpaper or Sanding Sponge
Before you start the art, you must ensure that you’re drawing on a smooth wooden surface. Generally, wood comes with rough areas that you need to smooth. This is when sandpaper or sanding sponges come in handy.
Moist Paper Towel
The paper towel will help you in preventing the surrounding surfaces from getting overheated. It also makes sure that the burn quickly settles onto the wood. You’ll need to wipe the surface every now and then to prevent overheating and residue from building up.
Mastering the Art
Pyrography can be a relatively simple art if done right. But this is not always the case. Pyrography Tools may require you to draw definitive structures and detailed objects which a very hard thing to do. You must also choose the best wood for pyrography. Regardless of all that, pyrography is very easy if you follow some basic steps. These steps are discussed below.
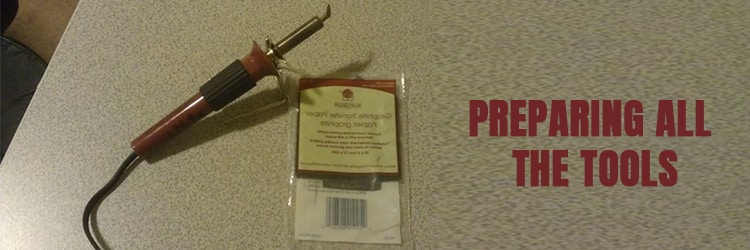
Step 1: Preparing All the Tools
Before you start the pyrography, you’ll surely need to prepare all the pyrography tools beforehand. Although a very subtle step, this can ensure that you have everything ready when you’re focusing on the art.
Step 2: Selecting the Wood
When you’re burning through the wood, you should ensure that the wood can be easily chipped with the pyrography pen. This is important for beginner pyrographers because using softer wood can make the art a lot easier. These softer woods are easier to burn and are generally cheaper, which means that it can be used for beginners and DIYers.
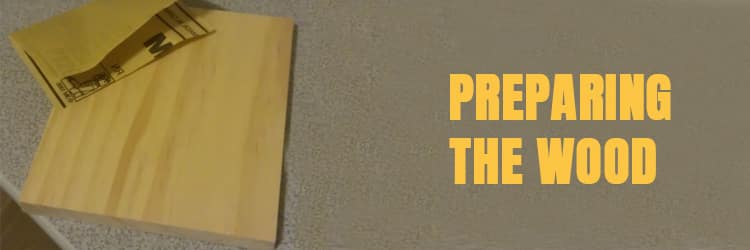
Step 3: Preparing the Wood
After you’ve chosen the wood, you must prepare it for pyrography. To do this, you’ll have to sand the wood surface and cut it wherever necessary to get the desired shape. However, before sanding, you must check if the wood has shallow nicks on dents. If yes, you can remove the dents by placing a wet cloth on top of the dents and then put a hot clothing iron on top of the cloth. Repeat this process several times till the dents disappear.
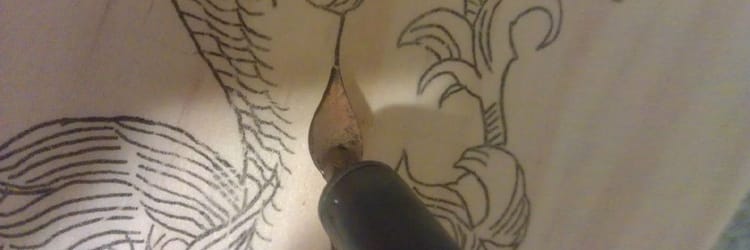
Step 4: Transferring the Design
If you are weak in freehand designing, you can surely transfer the design onto the wooden board. To do this, you’ll have to at first draw the design on to cut the carbon paper in the size of the board and then tape the image on top of it. When placing the design, you should make sure that you’re putting the image flipped.
Afterward, take a pen and trace all the outlines of the image. Draw all the necessary parts that you want to be placed on the wood. This will transfer the design onto the wood. Remove the design and tracing paper when you’re done.
Step 5: Begin the Pyrography
When you’re done with sanding and transferring the design, you can start drawing the pyrography patterns on the wooden board. To do this, you will have to at first plug in your Pyrography Tools and then wait for it to get heated. Once the pen is heated enough, you can start drawing over the sketch on the wood. Be extra careful not to shake your hands while you’re drawing. By using lighter strokes and taking your time, you can get yourself a beautiful and flawless design.
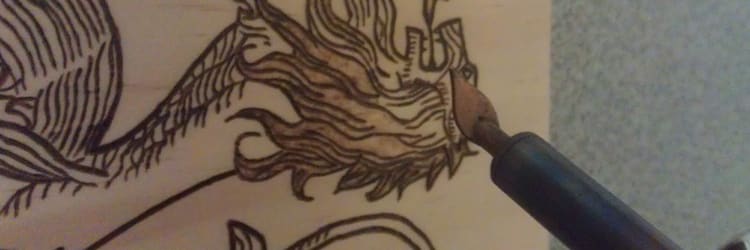
Step 6: Detailing
After drawing the main structure of the design, you should give importance to the detailing. Some designs require a lot of detail, whereas some require very little. By judging your design, you’ll have to plan through the detailing. Regardless of how much detailing you are supposed to do, you should always be slow and steady. Take your time and work through each and every detail part by part.
Step 7: Shading
Shading is an important step that you should master. This enhances the beauty of the pyrography art and gives it a sense of depth. Before you start shading, however, you must decide where exactly you want to shade and how darker will it be in comparison to the original design.
The shading in pyrography is just the same as any other normal shading technique. To get the perfect shade, you should hold the pen and barely make it touch the surface of the wood. Move the pen in a circular motion while maintaining the subtle contact. You should be agile and very careful. This is because if you put the pen in one spot for too long, you might end up with a non-uniform shade.
Step 8: Preserving the Pyrography
After you’re done with the shading, you should make sure that it lasts a very long time. This is why you can apply polyurethane, oil or wood stain on the wooden board. Before applying the coating, you should know the color of the coating you’re going to apply. If you use a darker coating, the shading will not be very visible.
Some Additional Pyrography Tips
Don’t be concerned if you mess up with the shading. If you think that you have darkened the shade too much, you can use sandpaper or a sanding sponge to carefully sand the area you want to change. Be sure to take your time and sand the area slowly.
Pyrography Tools for Beginners, DIYers, and Professionals
Pyrography Tools is a magnificent skill to learn. Although the initial steps to this artwork are the same for all types of people, there are few specific things that beginners, DIYers, and professionals need to know.
For Beginners in Pyrography
The beginners in this field of art should know that pyrography requires a lot of skills to master. It won’t happen overnight, so he/she must practice this art regularly. Along with practice, he/she has to know about all the types of wood that can be used for this art and which is more suitable. The safety concerns must be followed, and the beginner has to be extra cautious when he/she is working with the pyrography pen.
For the DIYers
The DIYers should maintain all the safety precautions with great care when practicing this art. They should take their time and sketch all the lines and grooves with high precision. When completing the detailing and shading, it is recommended that they plan their way through. For designs which require more detailing, the DIYers can use nibs of different sizes and shapes to get various of shades and details.
What About the Professionals?
Well, the professionals are already ‘pros’ in this art. They know each and every detailing and can precisely shade design to perfection. Although they might know many of the designs, it is suggested that they spend a considerable amount of time studying through some other designs that they are not familiar with. This will widen the range of opportunities for such professional pyrographers.
Some Great Pyrography Ideas
Interested in this art but can’t find ways to implement it? Well, don’t worry. We all face such problems when we practice a new art. If you really want to start Pyrography Tools as a beginner, you can use any of the ideas mentioned below and start working on it.
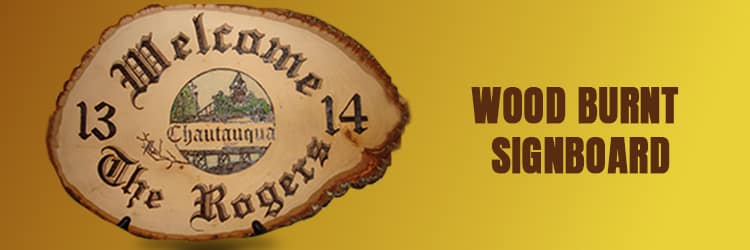
Wood Burnt Signboard
The wood burnt signboard has been used for many centuries. It gives a classy look and feels to the shop or company it represents. You can also use these in the entrance of your house or just put it up on a wall as a showpiece; these elegant and classic signboards are capable of grabbing anyone’s attention.
Wood Burnt Kitchen Spoons
You can also apply your pyrography skills onto something that you use daily such as kitchen spoons. The designs on the spoons are fairly simple to make and can be a great gift choice for any individual.

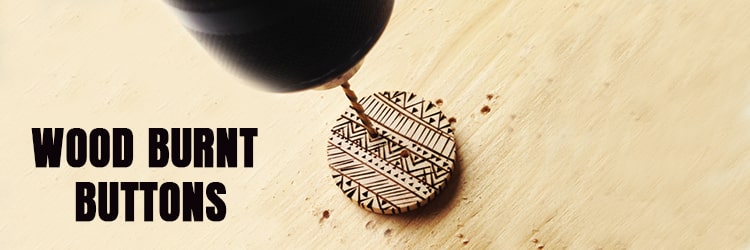
Wood Burnt Buttons
Another practical object that you can decorate using Pyrography Tools can be wooden buttons. Although it might seem a bit odd, it can enhance the beauty of the dress and can provide you with a nature-inspired tone. These are also great gift choices to make.
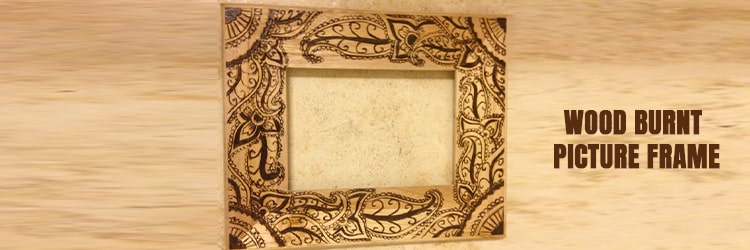
Wood Burnt Picture Frame
The wood burnt picture can be a unique way of preserving your memories. These are fairly easy to make and require little detailing, which is why you can do it within hours.
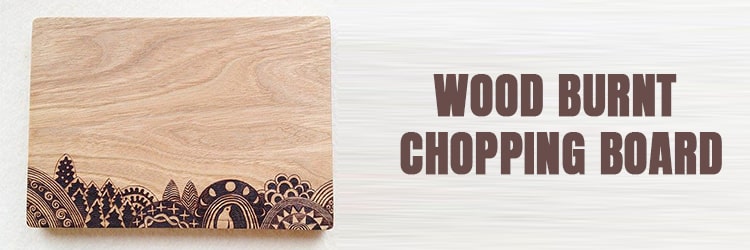
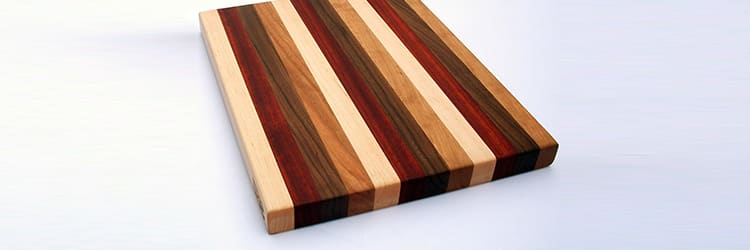
Wood Burnt Chopping Board
The wood burnt chopping board is another creative idea that you can work on. You can personalize your chopping board according to your personal preferences. Pyrography on such boards is simple and requires very little time, but if you want to draw more sophisticated patterns, you will have to invest a lot more time. Apart from chopping, it can also be used as a decoration on the wall. You can also gift these chopping boards to a person who loves cooking.
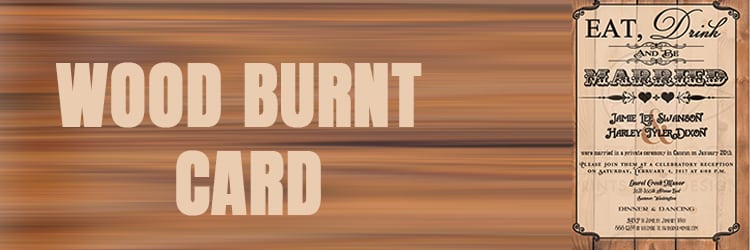
Wood Burnt Card
One of the more creative ideas, wood burnt cards can be a great way of expressing your gratitude or affection to a person who’s close to you. You can use Pyrography Tools to write on the wood and even decorate the card with different designs.
Wood Burnt Plates
How cool will it be to eat your food with a customized plate! You surely can make yourself such a plate. With a simplistic design, you can enhance the beauty of your plates and showcase your creativity.

Wood Burnt Hangers
Wooden hangers are common items that can be found in almost every households. How about decorating your own hangers? Decorating the hangers is a simple, yet fabulous way of representing your way of living and taste. It is also fairly easy to do and requires minimal time.

Safety Precautions for Pyrography
If you’re into pyrography, it’s more than likely that you’re familiar with the common misconception that only the pyrography pen causes a threat to the artist when pyrography. While it is partially true, we can’t disregard the safety threats coming from other factors in pyrography. These safety precautions are mentioned below.
Pyrography Pens
It is very important that you should be careful when working with the pyrography pens. When connected to the electric supply, the nib of the pens can get very hot. This can burn your skin if you don’t handle it properly. This is why it is always recommended that you keep a cool head and take your time while doing pyrography. You should also make sure that you properly plug out the pens and store them in a safe place away from the reach of children.
Nature Of Woods
It is important that you study the nature and toxicity of the wood that you’ll be using for your pyrography project. It is mainly because different species of wood has unique characteristics and contains different toxicity levels. When you’re burning the wood, these can cause wood smoke to appear. The wood smoke is very dangerous for the human body and can affect the lungs. In a report by the Health Institute of Washington, it was found that smoke from wood can be very toxic and can increase the chances of cancer, lung swelling, heart attack and even stroke!
Woods, You Should Avoid!
You should always avoid such wood that has been colored, polished or stained. While some may argue that sanding can remove the chemicals that protrude on the surface of the wood, it is high to be expected that some might remain deep into the surface. This signifies the importance of avoiding any man-made or altered wood altogether.
The artificial MDF (medium density fibreboards) and plywoods are prime examples of wood that you should avoid. These woods contain formaldehyde which poses a serious threat to the health. These also have glue between each board, which can be very harmful if inhaled.
Beware of the Dust
Along with the wood smoke, you should be also concerned about the wood dust that is produced during sanding. The wood dust is very toxic and can harm the internal organs. In a report by the National Cancer Institute, it has been proven that the wood dust increases the chance of lung diseases and serious cancers. This emphasizes the fact of why you should be extra careful when sanding the wood and always use a woodworking mask. The mask will prevent any particles that try to enter your body via the mouth or nose.
Pyrography for Kids
Pyrography can be an excellent way of showcasing the creativity of the kids. It is highly recommended that they take some time practicing this fascinating art. Pyrography is easy to do, and the kids will not necessarily need help after a certain time. However, parents need to be careful that they never leave their kids all by themselves until they learn this art.
The kids should be extra careful and should always follow the safety precautions for pyrography. The kids should not be allowed to plug in the cord to the electric mains. Parents should always be present with their kids when they’re working with the pyrography tools. It is also mandatory that the kids wear all the necessary gear (woodworking mask, gloves) before they start pyrographing. It is also recommended that the parents install a fan to blow out all the wood smoke that arises. If the safety precautions are followed, the kids can surely practice this art and can present their creativity and talent to the world.
Pyrography for Learners
Other than kids, anyone and everyone can practice this artwork. With the help of regular training, they can excel in pyrography. Pyrography is also taught in many schools and colleges. This enables anyone who’s interested in pyrography to understand the basics of pyrography and master this art.
In pyrography teaching centers, curious learners can study everything about pyrography. The courses includes: introduction to Pyrography, methods, as well as process, selecting and examining an array objects, patterns, getting idea of drawing, and painting, understanding their features and mastery of their work and appreciating work of other people and lastly, finding relation between arts and science or other subjects…
When practicing pyrography, the learners must ensure that they follow the safety procedures. They must also be very careful when working with the pyrography pen and must wear a mask. The room in which the learner is supposed to work should have proper ventilation so that the wood smoke diffuses out into the atmosphere.
Pyrography for Commercial Purposes
What if you’re a DIYer, and you want to make some money off your pyrography art? There are many people who can’t just figure it out. But in this modern era, selling your artwork is easier than ever! Don’t believe me? Let’s see what you’d need to do.
If you’re a great pyrographer, you can surely sell the artwork to your relatives. You can also build a stall and put up the work for display. If you need an easier solution, you can surely sell them to a local shop which sells pyrographic art.
Other than all that, you can use modern day technology to sell the artworks. The internet has enabled us to reach out to millions of people at once, which makes the process even easier. If you can make quality pyrographic art, you can use the online visibility to your advantage. Just put up an advertisement for your product and watch your product get sold out very quickly. One thing to remember when selling the pyrography arts online is that you will be met with the immense competition. If you can keep cool heads and make a marketing strategy, you can surely sell the pyrographic arts to people who’re interested.

Conclusion
Pyrography is an amazing art to master. It has played a crucial role in the cultures of the past civilizations and still has retained its spot in the traditional artworks. In the past, practicing pyrography was a tough task because of the unavailability of essential tools. People used to heat up smoldering iron and then beat it against the wooden surface until they got the desired grooves and designs. With the invention of pyrography pens and nibs, practicing this artwork has been easier than ever.
To start pyrography, you should at first select the proper wood for pyrography. Afterward, you should sand the wood and then trace the design onto the board. When you’re done with tracing and sanding, you can start burning through the outline. Finish the pyrography by shading the design, providing texture. To prolong the artwork, you can apply polyurethane, oil or wood stain on it.
When you’re practicing pyrography, you should be careful that you’re following all the safety precautions. On an ending note, pyrography arts can exhibit one’s true creativity and talent. Not only that, but you can also give certain properties to something a living by selling your pyrography arts. This indicates the importance of pyrography and its endless possibilities. It proves that this prominent art of the past has a bright future ahead.


