A benchtop planer is one of the finest carpentry tools designed to mill lumber. It can be a great support as you smoothen rough edges, cut wood to your desired thickness or shape, and flatten wooden boards. So, it’s nothing surprising you, all on a sudden, become interested in knowing how to use a benchtop planer, and this article talks about it in simple language.
All it takes is an understanding of the basics and enough time to experiment until you feel comfortable. A planer can help you greatly change the thickness of the boards. Planers do magic while providing a smooth finish to the rough surface of the lumber. But you will be benefited only a little if you don’t know how to use a benchtop planner efficiently. Go through this article to know how to use a benchtop player effectively.
How to Use a Benchtop Planer?
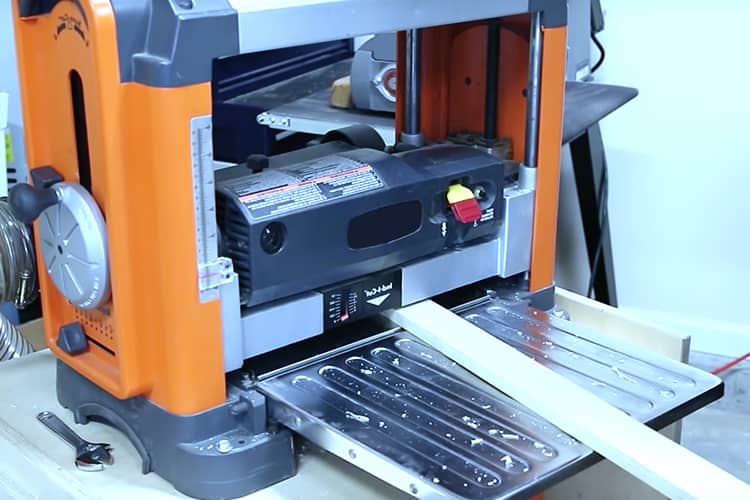
The first step at using a benchtop planer begins with getting familiar with its essential parts and features. Now, let’s highlight some of its operational features.
1. Getting Familiar with the Operational Features, Mechanism, and Parts
A benchtop planer is a portable woodworking machine that is used to shape, cut, and smoothen the edges of woods. If you’re using a benchtop planer, you’ll enjoy an improvement in your productive time and profits as it helps to ensure that your work piece is given the best finishing touch.
Components of a benchtop planer:
This thickness planer comes with the following elements
- Cutter head
- Rollers
- Table
- Dust collection attachment
- Scale and Pointer
You may find a few variants of these planers in terms of the fixability of the table and the adjustability of the roller assembly.
2. Preparing a Benchtop Planer for the Operation
Although a benchtop model works on the same principle as a typical planer, here are some benchtop planer tips to help you make its proper use and application;
i) Choose a Suitable Location
Because of the amount of sawdust and wood chips produced during the planning process, it is advisable to isolate it from the public and locate it at a place that will have minimal effect on the people.
ii) Set It Up
If you have familiarity with the different types of planers, you may already know that this stage is critical if you want to understand how to use benchtop planer.
- Unplug the planer
- Make sure that the blade area is free of debris. Sawdust and wood chips
- Endeavor to lower the infeed and outfeed table adjustment bolts to place the tables under the center table.
- Make sure that there is no blade that hangs underneath the unit of cutter head.
- Put the straight end firmly in the dedicated place.
- Make necessary adjustment to help the tables reach the last bottom part of the edge.
iii) Run a Test Drive
Once you have learned how the planer is set up, the next step is to put the machine on and test the machine. Draw lines on the surface of the wooden board using a pen or pencil to track the progress. Then, run the wooden board through the machine to get an idea of how it works.
3. Choosing Your Desired Finish
The two types of finishes achieved using this type of planer are namely; The finishing cut and dimensioning. When you switch between these two, you make the rollers move faster or slower, respectively.
For the finishing cut, you achieve a finer finish since there are more cuts done per inch. On the other hand, the dimensioning provides fewer cuts per inch and thus, a rougher finish. Now that you’ve finished planning the flat side of each board, it’s time to clean up the edges.
This is where you run each board through the planer on its side so that the narrow edge is smoothed and flattened. If you’re planning several boards at once that all need to be the same size. It’s advisable to run several of them through the planer at once.
You can typically safely run three to five boards on their edges through a planer at the same time. Remember to plane both sides of each board’s edges for a smooth finished product.
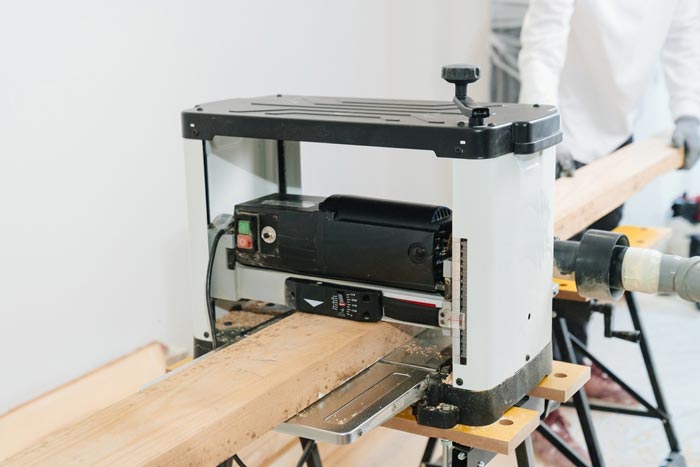
4. Feeding the Machine
Feed the machine with your desired wooden board. Run each wooden board through the planer lengthwise. Start by running them through with the planer running over the flat, the wide side of each board. Make sure you gradually adjust the planer, planning off a little more each time, rather than trying to take off large amounts at once. Instead of planning one board at a time, I prefer to plane them altogether if they need all to be milled to the same thickness. Remember to plane both sides of each wooden board for the smoothest and flattest finish possible.
5. Eliminating Sniping
Snipe is the most frustrating thing you may encounter when using a benchtop planer. When the knives cut more than it was supposed to cut from either of the sides or both sides. This sniping can be prevented by using a piece of another scrap wood of the exact same depth. Keep it firmly in a strong position while running it through the planer. Keep it away from the blade when it goes out from the board.
6. Avoiding the Tear out of the Grain
The grain often tears out if the blades run against the wood grain. This can be avoided by just turning the board around, to see how those blades are going along the grain as they may skim out the top part of these lines. At first, learn to read the wood grain direction. Then, run with the grain instead of running against the grain to avoid the tear out of the grain.
7. Avoiding Cuts and Gauging
This can be prevented by trying not to put the rough side on the front side in the planer. If you expose the rough side to the planer it may get caught by the grain. This will result in cuts and gauging of the wood. So, avoid cuts and gauging by keeping the rough side completely forward.
8. Deciding Whether or Not to Use the Depth Stop
One can adjust the depth by using control. This control allows the users to adapt to a compatible depth while milling wood. After setting the depth you can go on using the tool without any interference. You can avoid using the control by keeping the depth setting to a lower dimension so that it no more comes in between you and the cutting task.
9. Safety Precautions
Because a planer is a powerful tool that throws up a considerable amount of sawdust and wood chips, it’s essential to wear the proper safety equipment. Usage of planers also calls for safety tips just like other similar power tools like benchtop jointers.
Recommended safety equipment includes.
- Hearing Protection
- Eye Protection
- Safety Gloves
- Short sleeve shirts.
Meanwhile, the rules to be followed to prevent accident occurrence are.
- Wear short sleeve shirts and avoid wearing jewelry.
- Cover eye and ear with protective covers.
- Don’t apply the planner to wood board that measures less than ¼ inch.
- Don’t put your hands near the machine when it is on the fly.
- Don’t try to get rid of a board forcefully if it gets trapped in the planer. Switch off the machine and remove it gently.
- Make sure that the lines are switched off before changing the blades.
10. Using the Planer for Various Applications
A benchtop planer can be used for multiple applications which include:
i) Working on Deck Spindles
These planers are used to shave custom-planed spindles for rails. Remember to stack the spindles consistently so you can keep track of which sides you’ve planed. It helps to mark one face on the end of each spindle as a reference.
ii) Reclaiming a Piece of Old Wood
The most critical step in reclaiming an old piece of wood or lumber is to inspect carefully for screws and nails. Also, remove dirt and grit from the wooden board with a wire brush.
iii) Flattening a Roughly Sawn Lumber
The woodworking tool leaves a series of rough trenches in the wood that must then be flattened with another plane that has a straighter iron. Flip the piece of work over and run it through the planer again to flatten that face.
iv) Cleaning up Edges of a Board
Plane narrow edges by ganging bore stack boards side by side to plane off the saw marks. Look at the grain pattern and the face of the boards and orient each board to avoid tear-out.
v) Sanding out Ridges
Smoothen the ridges by using a knife of the right grit. You can use a sandpaper of 120-grit in this regard while sanding the wood with the pattern of the grain. The most effective way to sand out ridges is to use good-quality sandpaper. A commercial sandpaper can provide you with the required finish within a few minutes.
A benchtop planer can be useful in shaving or milling of lumber. It is cheap, affordable and less complicated in usage. For the new freebies who are looking for benchtop planner tips. Knowing how to use a benchtop planer efficiently is essential as it helps to prevent any case of an unforeseen and irrelevant hazard.


